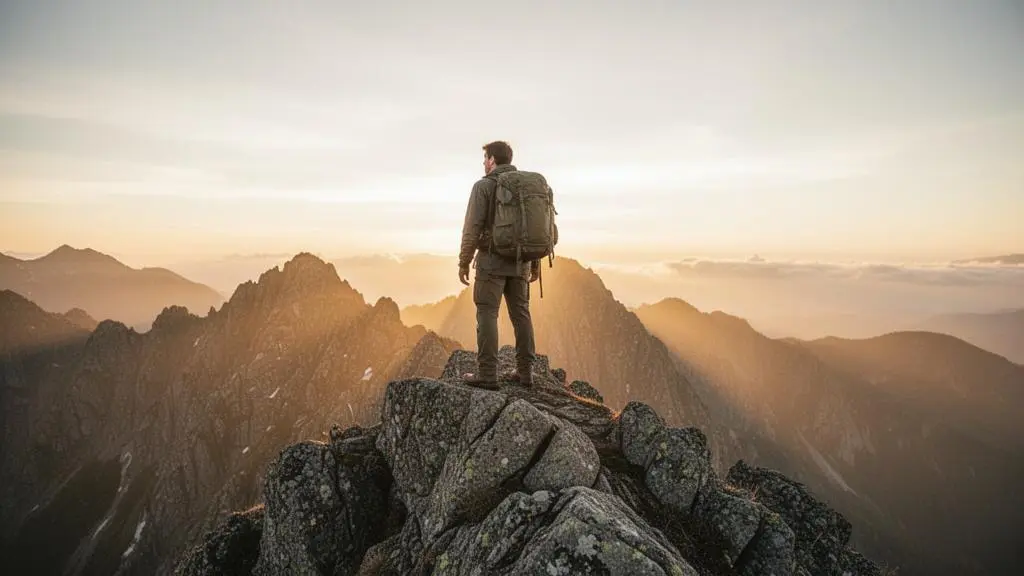
Finding an untouched, non-technical summit is not about luck; it’s a strategic process of reverse-engineering access from peak to parking.
- True solitude magnifies the experience by leveraging novelty, which hard-wires memories more effectively than visiting crowded, familiar landmarks.
- The key is to use topographic and satellite maps to identify high-elevation access points first, then find the peak, rather than the other way around.
Recommendation: Start your search by scanning for unpaved forest service or logging roads that climb high onto a mountain’s shoulder—these are the hidden gateways to your non-technical summit.
The feeling is familiar to any peak-seeking hiker: you push through the final ascent, heart pounding, only to find the summit crowded with dozens of other people, all vying for the same photo spot. The sense of wildness and accomplishment evaporates into a queue for a scenic overlook. Standard advice often points you toward popular, well-maintained trails, reinforcing this problem. You’re told to use the same apps, follow the same routes, and as a result, you find the same crowds.
But what if the goal isn’t just to summit a peak, but to experience the profound solitude and quiet awe that only an untouched mountain can offer? What if the key wasn’t better hiking endurance, but a better strategy for finding the right mountain in the first place? This guide is not about technical climbing or expensive mountaineering gear. It’s about a different kind of skill: the ability to see a map not as a collection of trails, but as a landscape of possibilities. It’s about learning to reverse-engineer access to achieve a solitary summit experience.
We’ll explore the science behind why these quiet moments are so memorable and provide a repeatable methodology for finding these hidden peaks. We will cover how to choose the right type of route, avoid common navigational errors, manage your time for a safe descent, and use your gear effectively. This is your blueprint for leaving the crowds behind and claiming a piece of the sky for yourself.
This article provides a complete framework for your next adventure. Below is a summary of the key strategic pillars we will explore to transform you from a trail-follower into a true peak-finder.
Summary: A Strategic Guide to Finding Solitary Summits
- Why Solitary Summit Experiences Create 3× Stronger Memory Formation Than Crowded Peaks
- How to Find Summit Trailheads With Car Access and Under 2-Hour Walking Time
- Ridge-Walk Summits or Direct Peak Climbs: Which Route Maximises Views Per Hour
- The Map-Reading Mistake That Strands 30% of Solo Summit Seekers
- What Time Must You Leave a Summit to Descend Safely Before Nightfall
- Why Hidden Natural Wonders Deliver More Memorable Experiences Than Famous Landmarks
- How to Plant Trekking Poles to Transfer 25% of Your Weight Off Knees
- How to Find Trailheads With Parking, Facilities and Route Options Matching Your Ability
Why Solitary Summit Experiences Create 3× Stronger Memory Formation Than Crowded Peaks
The pursuit of a solitary summit is more than just avoiding crowds; it’s a deliberate act of crafting a more powerful and lasting memory. When you stand alone on a peak you worked hard to find, the experience is encoded differently in your brain. This isn’t just a romantic notion; it’s rooted in neuroscience. Our brains are wired to pay special attention to new and unique environments. A behavioral neuroscience study on memory formation found that novel experiences trigger a significant release of dopamine and norepinephrine in the hippocampus. This is the brain’s way of saying, “This is important. Remember this.” This is the dopamine dividend of your effort.
This biological mechanism explains why the view from a hidden, un-crowded peak feels so much more profound than the view from a famous, easily-accessible overlook. The crowded landmark, seen countless times online, offers little novelty. Your brain treats it as familiar. The solitary summit, however, is entirely your own. Every gust of wind, every distant ridgeline, every shifting cloud is a fresh stimulus. Research from the University of Edinburgh confirms this, stating that novel experiences induce dopamine release in the hippocampus, a process which directly promotes the persistence of memory.
By seeking out these untouched places, you are not just hiking; you are actively engaging the machinery of your own memory. You are ensuring the effort of the ascent is rewarded not just with a photograph, but with a deeply ingrained, emotionally resonant experience that will stay with you long after the muscle soreness fades. The silence is not empty; it is the canvas upon which a powerful memory is painted.
This profound psychological reward is the ultimate “why” behind the strategies that follow. It’s the motivation to trade the certainty of a marked trail for the adventure of discovery.
How to Find Summit Trailheads With Car Access and Under 2-Hour Walking Time
The secret to unlocking non-technical summits lies in a strategy of “reverse-engineering access.” Instead of picking a popular trail from a guidebook and hoping for the best, you start with the goal—a solitary peak—and work backward to find the easiest way in. This often means looking for trailheads that aren’t on official park maps. The key is to find high-elevation access roads, like logging or forest service roads, that can get your vehicle closer to the alpine zone, cutting out hours of strenuous ascent from the valley floor. Your goal is to find a starting point that puts you within the ‘parking-to-peak’ window of two hours.
Your primary tools are digital topographic maps and high-resolution satellite imagery. First, on a topo map, identify a peak that looks promising: a clear summit with rounded or ridged approaches, free of cliff bands or overly steep contour lines. Now, switch to satellite view. Scan the flanks of the mountain. Are there any unpaved roads climbing its sides? Trace them. Often, you’ll find they end at a small, unofficial pull-off or an old loading area. This is your potential trailhead. Cross-reference this location back on the topo map to understand the terrain you’d have to cross from that point to the summit.
The ideal route from this point is often not a straight line. Look for ways to use the landscape to your advantage. Following a gentle contour line around the side of a hill can be far more efficient than going straight up and down. A broad, open ridge is your highway to the summit, offering solid footing and gradual elevation gain. This method requires more planning than simply typing a name into a GPS, but it is this very process of discovery that filters out the crowds and guarantees the solitude you seek.
Once you arrive at this potential starting point, your map and compass skills become paramount, but the physical barrier to entry has been dramatically lowered.
Ridge-Walk Summits or Direct Peak Climbs: Which Route Maximises Views Per Hour
Once you’ve identified a potential peak, the next strategic choice is the nature of your route. Broadly, non-technical ascents fall into two categories: the ridge walk and the direct peak climb. The choice between them isn’t just about the path of least resistance; it’s about deciding what kind of experience you want. The best way to evaluate this is by considering the “view-to-effort ratio”—how much scenic reward you get for every hour you invest in hiking.
A ridge-walk summit approach is often the winner for maximizing this ratio. By gaining a high ridge early on and following it towards the peak, you are exposed to expansive, evolving views for the majority of your hike. Every step offers a new perspective. The trade-off is greater exposure to wind and weather, and you must be confident in your ability to navigate with clear landmarks potentially miles away. Ridge walks are about the journey; the summit is simply the glorious culmination of a continuously scenic trek.
A direct peak climb, by contrast, often involves ascending through a forested valley or a protected gully. The views are limited for much of the ascent, with your focus directed on the trail immediately ahead. This can be mentally easier for some, as the goal is simply “up.” The reward is concentrated at the end: a dramatic, “big reveal” moment when you break out of the trees or crest the final slope and the entire panorama opens up at once. This approach can be more sheltered from the elements but may feel like more of a slog. It prioritizes the destination over the journey.
For those seeking constant stimulation and a sense of moving through a vast landscape, the ridge walk is unparalleled. For those who enjoy a focused, meditative climb with a singular, dramatic payoff, the direct ascent is the clear choice.
The Map-Reading Mistake That Strands 30% of Solo Summit Seekers
The single most dangerous mistake a non-technical summit seeker can make isn’t misjudging weather or running out of water; it’s a subtle navigational error called navigational drift. This is the phenomenon where a hiker, often distracted or overconfident, misses a subtle turn or continues following a plausible-looking game trail instead of the intended route. The terrifying part is that you don’t realize your mistake for 20-40 minutes, by which time the terrain no longer matches your map. It’s a quiet, insidious error, and it happens alarmingly close to safety; data on lost hikers shows they are found an average of just 58 meters from the nearest trail.
This isn’t about getting hopelessly lost in the wilderness; it’s about a small deviation that, if not corrected immediately, escalates into a serious situation. The temptation when you realize you’re off-track is to panic and try to take a “shortcut” cross-country back to where you think the trail should be. This is the second mistake, and it’s the one that truly gets people into trouble, compounding the initial error. The correct response is counter-intuitive: you must stop moving forward.
As soon as you feel that prickle of disorientation—that sense that the landscape doesn’t quite match your mental map—you must immediately halt your forward progress. Pushing on “just a little further” is a recipe for disaster. The only safe and reliable response is to stop, take a breath, and meticulously backtrack your steps to the last point where you were 100% certain of your location. This might be a distinctively shaped tree, a creek crossing, or a trail junction. It feels like losing progress, but it’s actually the fastest way to get back on track safely.
Your Action Plan: The ‘Lost-Proof’ Protocol
- Recognize the trigger: The terrain stops matching your map or GPS after you’ve been following what seemed like a clear path (often a game trail).
- Stop immediately: The moment you feel disoriented, cease all forward movement. Do not try to “push through” to find the trail ahead.
- Backtrack: Turn around and retrace your steps to the last point you were 100% certain of your location, like a signed junction or a major landmark.
- Re-orient: At that last known point, pull out your map and compass. Carefully re-read signage and analyze the terrain before committing to your next step.
Adopting this protocol transforms navigation from a source of anxiety into a manageable system, giving you the confidence to explore with a built-in safety net.
What Time Must You Leave a Summit to Descend Safely Before Nightfall
Reaching the summit is only halfway. A safe and successful trip requires getting back to your vehicle before darkness falls, and this requires a non-negotiable turnaround time. Many hikers make the mistake of pushing for the summit at all costs, only to find themselves in a dangerous situation, descending in the dark on unfamiliar terrain. As a guide, my most important rule is simple: the mountain will be there tomorrow. Your safety is paramount. Calculating your absolute latest summit departure time is a critical, non-emotional decision you must make before you even start.
Here is a simple, reliable formula to use: [Time of sunset] – [Your estimated descent time] – [1-hour safety buffer] = Your “must-leave-summit” time. Let’s break that down. First, check the exact sunset time for your location and date. Second, estimate your descent time. A common rule of thumb is that descending takes about half to two-thirds of your ascent time. So if it took you two hours to reach the summit, budget at least 1 hour and 20 minutes for the descent (two-thirds of 120 minutes). Be honest with your fitness level and the terrain; a steep, rocky descent can be just as slow as the climb.
Finally, and most importantly, always subtract a one-hour safety buffer. This buffer is not optional. It accounts for unforeseen delays: a twisted ankle, a navigational pause, or simply moving slower than anticipated due to fatigue. For example, if sunset is at 7:00 PM and your descent will take 1.5 hours, your calculation is 7:00 PM – 1.5 hours – 1 hour = 4:30 PM. In this scenario, 4:30 PM is your absolute latest departure time from the summit, no matter how close you are. You must set an alarm on your watch for this time and obey it without question. This disciplined approach to time management is the hallmark of a self-reliant and safe mountain traveler.
Sticking to your turnaround time, even if it means not reaching the summit, isn’t failure. It’s the successful execution of a safe hiking plan, ensuring you’ll be able to come back and try again.
Why Hidden Natural Wonders Deliver More Memorable Experiences Than Famous Landmarks
The drive to find an untouched summit is a specific manifestation of a broader human desire: the search for authentic discovery over pre-packaged tourism. There’s a growing fatigue with the “bucket list” approach to travel, where success is measured by ticking off a list of world-famous landmarks. In fact, this sentiment is widespread; a YouGov survey found that 41% of Americans are concerned about overtourism at popular destinations. This concern isn’t just about crowds; it’s about the quality of the experience itself.
A famous landmark comes with a heavy weight of expectation. You’ve seen it in photos, movies, and social media feeds. When you finally arrive, the experience is often one of comparison—”Does it look like the picture?”—rather than pure, unadulterated discovery. The moment is shared, curated, and to some extent, predictable. This robs the experience of the neurological “novelty” bonus that is so crucial for creating strong, personal memories. The magic of discovery has been outsourced to others.
In contrast, a hidden natural wonder—a waterfall not on any map, a secret cove, or a solitary summit you found yourself—has no pre-written script. There are no expectations to live up to. The experience is entirely your own, from the challenge of finding it to the quiet moment of arrival. This process of personal effort and discovery creates a powerful sense of ownership and connection. The memory is not just of the place, but of your journey to it: the map reading, the wrong turns, the final triumphant moment of arrival. It’s an experience you have earned, not one you have simply consumed.
This is why the effort of finding these places is so richly rewarded. You are not just seeing a sight; you are writing a story with yourself as the protagonist.
How to Plant Trekking Poles to Transfer 25% of Your Weight Off Knees
For any hiker, but especially one tackling ascents and descents on uneven terrain, trekking poles are not a crutch; they are a high-performance tool. Their primary benefit is the significant reduction of strain on your joints. When used correctly, especially on downhills, poles can feel like you’ve suddenly gained a second set of legs. The science backs this up: biomechanical research on downhill hiking shows a reduction of up to 25% in compressive force on the knee joints when using trekking poles. Over thousands of steps, this is a massive saving that reduces fatigue and prevents next-day soreness.
However, simply carrying poles is not enough; proper technique is essential to unlock this benefit. The key is to actively transfer your weight onto the poles with each step, turning your upper body into part of the engine. Think of it as engaging all-wheel drive instead of just relying on your legs. On flat ground, adjust the poles so your elbows are at a 90-degree angle. On the ascent, shorten the poles slightly and plant them behind you to push yourself uphill. On the descent, lengthen them and plant them in front of you to act as brakes, absorbing the impact that would otherwise hammer your knees and quads.
The motion should be rhythmic and integrated with your stride, using an opposite-arm, opposite-leg pattern just like walking. Plant the pole tip firmly and deliberately, feeling it bite into the ground. Then, apply pressure through the strap and grip, consciously taking weight off your legs. Mastering this simple skill transforms your endurance, allowing you to go further, feel stronger, and focus on the views instead of your aching knees.
It’s one of the simplest yet most effective ways to enhance your performance and comfort in the mountains, making your pursuit of solitary summits more sustainable and enjoyable.
Key takeaways
- Solitude is a tool: Seeking out untouched peaks leverages brain chemistry (dopamine release) to create stronger, more meaningful memories.
- Strategy over stamina: The key to finding non-technical summits is not just being a strong hiker, but being a smart planner who can reverse-engineer access from maps.
- Safety is a system, not a feeling: Disciplined use of turnaround times, navigational protocols, and proper gear are what enable confident exploration.
How to Find Trailheads With Parking, Facilities and Route Options Matching Your Ability
The strategic discovery phase using maps is just the first step. The final, crucial part of your pre-trip planning is the verification phase. This is where you cross-reference your theoretical route with real-world information to ensure it’s not only feasible but also matches your ability and risk tolerance. This step grounds your adventure in reality and is essential for safety. Your goal here is to gather “beta”—practical, experience-based intel on current conditions.
This is where tools like AllTrails and other online hiking forums become invaluable, not for discovering the route, but for verifying it. Search for the name of the peak or nearby landmarks. Read the reviews carefully. Are other hikers mentioning that the forest service road you identified is washed out? Is there talk of aggressive wildlife or a lack of water sources? This is the information that a map alone cannot provide. Pay close attention to comments on parking—is the unofficial pull-off you spotted on satellite view known and used, or is it on private land? As one solo hiker puts it, the research is multi-layered:
I research the trail before hitting it to make sure I also know about water sources and bailout points… During my breaks, I thoroughly look around to make sure I note down the route, key landmarks, and trail junctions.
– A solo hiker, Hiking Insights
Your final pre-hike checklist should involve creating redundancy in your navigation system. Do not rely on a single tool. Download an offline GPS map of the area to an app like Maps.Me, but also carry a physical paper map and compass. Take screenshots of key blog write-ups or trail descriptions. This combination of digital planning, community-sourced intel, and analog backup creates a robust safety net. You’ve already done the hard work of finding a unique route; this final check ensures you can execute it with confidence.
Now that you have a complete strategic framework—from the neurological motivation to the practical planning and safety protocols—the only thing left to do is pick a distant peak on a map and begin the rewarding process of making it your own.