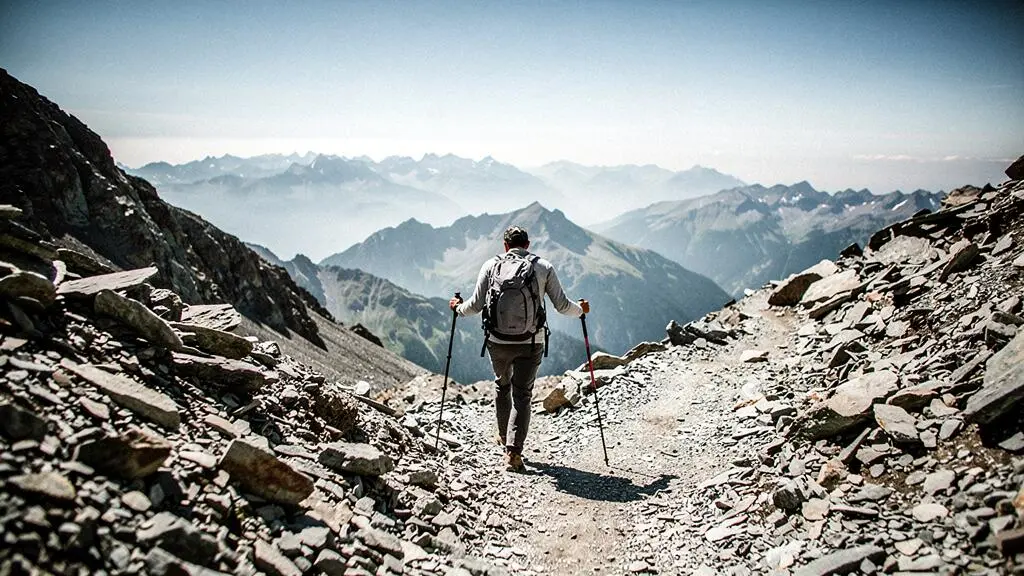
In summary:
- Reducing knee impact is a skill based on technique, not a feature you buy. Your poles are biomechanical tools, not just supports.
- Pole length must be dynamically adjusted for uphills, downhills, and traverses; a fixed 90-degree elbow angle is a common mistake.
- The “tripod plant” technique is key to effectively transferring up to 25% of your body weight from your knees to your upper body.
- Over-reliance on poles on flat terrain can weaken your natural balance; they should be used strategically when benefits outweigh the energy cost.
For hikers, especially those over 35, the sharp, grinding pain in the knees during a long descent is an all-too-familiar feeling. It can turn the triumphant final miles of a beautiful hike into a dreaded ordeal. The common advice is simple: get a pair of trekking poles. Many hikers do, assuming the poles themselves are the solution. They set them to the standard 90-degree elbow angle, buy the lightest carbon fiber model, and expect their joint pain to vanish. Yet, for many, the relief is minimal, and they may even develop new aches in their shoulders and wrists.
The problem is a fundamental misunderstanding of what trekking poles do. They are not passive crutches. They are an active biomechanical system, a set of tools that, when used correctly, can function like a tuned suspension for your body. The promised benefit of reducing knee impact isn’t a feature inherent in the pole; it’s a result achieved through mastering a specific skill set. It requires understanding how to transfer load through your body’s kinetic chain, from the ground, up the poles, and into your arms and core, effectively bypassing the vulnerable knee joint.
But what if the key wasn’t the pole’s material or its grip, but how you dynamically change its length with every shift in terrain? What if the secret to saving your knees lies in the precise angle and timing of your pole plant? This guide moves beyond the generic advice. It is a deep dive into the biomechanics of effective pole use. We will deconstruct the techniques that deliver genuine, measurable joint protection, explore the crucial gear choices that support these techniques, and even identify the common mistakes that can lead to a dangerous over-reliance on your equipment.
This article provides a comprehensive framework for transforming your trekking poles from simple walking sticks into powerful tools for joint preservation and hiking longevity. The following sections break down each critical component, from foundational techniques to advanced terrain strategies.
Summary: How to Master Trekking Poles for Joint Protection
- Why Incorrect Pole Length Eliminates Benefits and Can Increase Shoulder Strain
- How to Plant Trekking Poles to Transfer 25% of Your Weight Off Knees
- Twist-Lock or Flip-Lock: Which Trekking Pole Locking System Stays Secure Longer
- The Overuse Mistake That Makes You Unable to Hike Safely Without Poles
- When Do Trekking Poles Deliver Genuine Benefits Versus Adding Unnecessary Weight
- How to Position 20-Minute Beach Walks for Maximum Respiratory Benefit
- Coastal Rock Formations or Mountain Peaks: Which Natural Wonders Suit Your Travel Style
- How to Reach Untouched Mountain Summits Without Technical Climbing Skills
Why Incorrect Pole Length Eliminates Benefits and Can Increase Shoulder Strain
The most common piece of advice for trekking pole length—adjusting them so your elbow is at a 90-degree angle on flat ground—is not wrong, but it’s dangerously incomplete. Treating this as a fixed rule for an entire hike is the primary reason many users fail to get any real benefit and may even cause new problems. Your body’s relationship to the ground changes with every slope. A pole length that’s perfect for a flat trail becomes too short on a descent and too long on an ascent, forcing your body into an unnatural, inefficient posture that can strain your shoulders and wrists.
Think of your poles not as rigid stilts, but as a tuned suspension system. The correct length allows you to maintain an upright posture while effectively transferring load to your upper body. Too short, and you hunch over, stressing your back. Too long, and you force your shoulder into a high, awkward position, risking impingement. The key is dynamic adjustment: changing the length of your poles in response to the terrain.
Case Study: Biomechanical Proof of Load Redistribution
A pivotal study examined experienced hikers on a downhill slope with varying backpack weights. The results were clear: using poles correctly created a significant reduction in the rotational forces (joint moments) and peak power absorption at both the ankle and the knee. This confirms that proper pole mechanics genuinely redistribute joint load throughout the kinetic chain, rather than simply providing a false sense of support. The technique, enabled by correct pole length, is what delivers the protection.
This concept is visualized below, where one pole flexes to absorb energy like a car’s suspension, while the other remains rigid, transferring a jarring impact directly up the arm. The goal is to always be the former, not the latter.
Mastering dynamic adjustment is fundamental. It ensures that the poles work with your body, not against it, allowing for a fluid transfer of energy and a significant reduction in joint stress. To apply this principle in the field, follow these guidelines:
- When descending, lengthen your poles in 5-10 centimeter increments from your baseline setting. The steeper the decline, the longer your poles should be to allow you to plant them ahead of you without leaning too far forward.
- On traverses and sidehills, shorten the pole on the uphill side and lengthen the one on the downhill side to keep your torso upright and your shoulders level.
- The guiding rule is comfort and balance. Your pole length should always support a natural, upright posture without causing any discomfort in your joints.
- Remember that your pole length should be as variable as your pace. It should change in relation to the terrain, not remain fixed for the entire hike.
How to Plant Trekking Poles to Transfer 25% of Your Weight Off Knees
Simply having poles of the correct length is only half the battle. The real magic of joint protection comes from the technique of the pole plant. When done correctly, you can actively perform a load transfer, moving a significant portion of your body weight and the braking forces of a descent away from your knee and ankle joints and into your arms, shoulders, and core. This isn’t a passive benefit; it’s a conscious, learned movement.
On steep descents, the compressive and shear forces on the knee joint are immense. However, as one expert from CNN Health notes on the biomechanics of pole walking, “You’re transferring more energy to your arms and shoulders.” This is the goal. Studies confirm the effectiveness of this technique, with biomechanical research on downhill walking finding a 12-25% reduction in knee joint forces when poles are used correctly. To achieve this, you need to create a stable structure with every step.
Action Plan: The Tripod Technique for Stable Descents
- On steep terrain, ensure your poles are at a uniform, extended length. Plant both poles slightly ahead of you and to the sides simultaneously.
- Step forward with one foot, placing it on the ground between the two pole tips. This creates a stable triangle of support.
- As you step, consciously lean into the poles, using your arms and core to bear weight and control your descent. This actively shifts the stress of braking from your knees to your upper body.
- For grip on rock and scree, switch to the rubber tip. Reserve the sharper metal or carbide tip for icy or soft-ground conditions where it can dig in.
- Repeat this “plant-then-step” tripod sequence, creating a rhythm that provides constant support and load distribution throughout the descent.
Mastering this tripod plant transforms you from someone just carrying poles to someone actively using them as a braking and support system. It engages your entire body in the act of descending, spreading the workload and dramatically reducing the peak impact forces that wear down your knees over time.
Twist-Lock or Flip-Lock: Which Trekking Pole Locking System Stays Secure Longer
A trekking pole is only as good as its weakest point, which is almost always the locking mechanism that holds the telescoping sections in place. A lock that slips under pressure is not just annoying; it’s a serious safety hazard, especially on exposed terrain where a sudden collapse can lead to a dangerous fall. The two dominant systems on the market are the internal twist-lock and the external flip-lock (also called a lever-lock), and the choice between them impacts reliability and field maintenance.
Twist-locks work via an internal expander that presses against the inside of the pole shaft. They offer a sleek, snag-free profile but can be harder to tighten sufficiently (especially with cold hands or gloves) and are more prone to jamming if dirt or moisture gets inside. Flip-locks use an external lever to clamp down on the pole section. They are bulkier but offer a clear visual confirmation of being locked and are generally easier to operate and adjust on the fly. The tension on a flip-lock can often be tightened with a simple quarter-turn of a dial, no tools required.
Ultimately, both systems can be reliable if well-maintained. The best choice depends on your priorities: a streamlined design versus ease of use and field serviceability. Regardless of the system, knowing how to perform basic field maintenance is crucial for ensuring your poles remain a trustworthy tool.
- If a twist-lock begins to slip, collapse the section completely. Thoroughly dry the inner and outer tubes and wipe away any grit. Re-expand it firmly, repeating the process until the mechanism is clean and dry enough to bite securely.
- If a flip-lock starts to slip, you can usually give the tension knob a simple quarter-turn clockwise to increase the clamping force, even while on the trail.
- Before trusting either system on a critical section of trail, perform a quick check. Ensure you can operate the lock and visually or physically confirm it is securely engaged, even while wearing gloves.
The Overuse Mistake That Makes You Unable to Hike Safely Without Poles
While trekking poles are a powerful tool for joint protection, there is a subtle danger in their use: proprioceptive laziness. By constantly relying on poles for balance, even on easy, flat terrain, you can unintentionally de-train your body’s natural ability to stabilize itself. Your brain starts to outsource the micro-adjustments normally made by your ankles, knees, and core to the input from the poles, leading to a state of dependency.
This creates a risky situation where you become less stable and more prone to injury when hiking without them. The very tool meant to enhance your safety can, through overuse, become a crutch that weakens your intrinsic skills. This experience is common among avid hikers who find themselves unable to tackle even moderate descents without poles.
In the last few years, my interest and ambition for hiking has grown and surpassed what my knees are willing to put up with — I have some pain on most hikes now, and can’t go beyond 8-10 miles without significant pain, especially when descending.
– A hiker on OregonHikers.org
Another hiker in the same discussion highlighted this dependency, noting that stopping pole use for just a few steps on a steep downhill caused immediate knee pain. This suggests the poles were doing meaningful work, but also raises the question of how much the body had come to depend on them. The key is to use poles as a strategic tool, not a constant requirement. Adopting a clear field ethic can prevent this over-reliance.
- Adopt a “hiker’s ethic” of keeping poles collapsed and stowed on long, flat, and easy sections of trail. Use your body’s own balance system whenever possible.
- On descents, even when using poles, focus on keeping your knees soft and your steps short. Resist the urge to lock your joints and lean heavily on the poles as crutches. They are there to assist, not replace, your leg muscles.
- Always use two poles as a matched pair. Using a single pole creates an asymmetrical support system, which can lead to muscular imbalances and a one-sided dependency.
When Do Trekking Poles Deliver Genuine Benefits Versus Adding Unnecessary Weight
Trekking poles are not a universally beneficial tool for every type of hike. On some outings, they provide critical support and joint protection; on others, they are little more than unnecessary weight and a cumbersome accessory. The decision to carry them should be a strategic one, based on terrain, pack weight, and your own physical condition. Using poles on an easy, flat trail can be counterproductive, as research reviewed by Physiopedia indicates that using poles increases overall energy expenditure by ~20% due to the engagement of arm and shoulder muscles. This extra effort is only worthwhile when the joint-sparing and stability benefits outweigh the metabolic cost.
This decision matrix provides a clear framework for when poles are an asset versus a liability. The analysis shows that poles are most valuable in scenarios with significant vertical change or heavy loads, where their impact-reduction capabilities are maximized.
| Scenario | Verdict |
|---|---|
| Sustained climbs/descents, pack over 15 lbs, prior knee issues, or river crossings | Clearly worth it, since these conditions are exactly where poles intercept the most impact and provide the most stability. |
| Short, flat day hikes on smooth trails | Borderline, as the leg-energy savings rarely outweigh the added arm effort on easy terrain. |
| Class 3 scrambling or photography-focused outings | Actively in the way, since poles occupy the hands needed for handholds or camera work. |
The bottom line is to be intentional. Don’t carry poles out of habit. Carry them when you can anticipate a clear, tangible benefit that justifies the added weight and effort. For hikers with pre-existing knee or ankle issues, that threshold will be lower, but the principle of strategic use remains the same. They are a specialized tool, not a one-size-fits-all solution.
How to Position 20-Minute Beach Walks for Maximum Respiratory Benefit
The principles of pole-assisted biomechanics are not limited to mountainous terrain. A fascinating application can be seen in Nordic walking, a cousin to trekking that is often practiced on flat ground, such as parks or beaches. While the goal here isn’t saving knees from downhill impact, it powerfully demonstrates how poles transform walking into a full-body exercise with significant cardiovascular and respiratory benefits.
When you walk normally, you are primarily using the muscles of your lower body. By introducing poles and adopting an active planting-and-pushing motion, you engage your arms, shoulders, chest, and back. This recruitment of upper-body musculature fundamentally changes the nature of the exercise. It demands more from your cardiovascular system to supply oxygen to this wider range of working muscles. In fact, the Mayo Clinic News Network reports that this technique can burn up to 20% more calories compared to regular walking at the same pace.
For a hiker, a 20-minute pole-assisted beach walk is not just a pleasant stroll; it’s an effective cross-training session. It strengthens the exact upper-body muscles needed for the load-transfer techniques used on mountain descents, all while in a low-impact environment. It trains your body to integrate the arms and core into your gait, improving overall efficiency and endurance. This serves as a perfect illustration that pole use is a system of movement, one whose benefits in energy expenditure and muscle engagement are just as real on a flat beach as they are on a steep slope.
Coastal Rock Formations or Mountain Peaks: Which Natural Wonders Suit Your Travel Style
The decision to hike along a rugged coastline or aim for an inland mountain summit often comes down to aesthetic preference, but from a biomechanical perspective, they present distinct challenges that demand different applications of pole technique. Both can be demanding on the joints, but the nature of the terrain requires a nuanced approach to using your poles as a tool for stability and support.
Mountain trails often involve long, sustained ascents and descents on relatively predictable surfaces like dirt or scree. Here, poles are used rhythmically for propulsion uphill and braking downhill, with dynamic length adjustment being key. Coastal routes, however, often feature short, steep, and technical scrambles over uneven rock. The terrain is less rhythmic and more puzzle-like. Here, poles are used less for cadence and more for probing and maintaining a third or fourth point of contact. The key is that in both environments, when used correctly, poles are highly effective. For example, research cited by Point Performance shows that proper pole use can reduce knee strain by 12-25%, a benefit that holds true regardless of the environment, provided the technique is adapted.
Adapting your strategy to the specific terrain is crucial for maximizing benefits and ensuring safety. Here are some key technical differences:
- On technical coastal terrain or scree fields, the most crucial technique is to think ahead, using the pole tip to probe for stable foot placements before committing your weight.
- Switch to the rubber tip for reliable grip on slick coastal rock, reserving the carbide tip for the softer ground or icy patches more common in alpine environments.
- On loose coastal scree or gravel slopes, you can use the surface to your advantage, planting your pole firmly and letting the loose material cushion your steps as you descend.
Key takeaways
- The greatest benefit of trekking poles comes from skilled technique, not expensive materials. Focus on mastering load transfer.
- Pole length is not static. It must be dynamically adjusted for every change in slope to maintain posture and efficiency.
- Poles are a strategic tool. Avoid using them on easy, flat terrain to prevent over-reliance and maintain your body’s natural balance mechanisms.
How to Reach Untouched Mountain Summits Without Technical Climbing Skills
For many hikers, the ultimate goal is to stand on a summit and survey the world below. Trekking poles can be the key that unlocks non-technical peaks that might otherwise seem out of reach, transforming a steep, intimidating final push into a manageable and secure ascent. On the loose, uneven ground often found near a summit, poles evolve from a simple walking aid into a critical tool for probing, stability, and force generation.
As you approach the summit, the terrain often becomes steeper and the footing less certain. This is where advanced pole techniques become essential. It’s no longer about a simple rhythm, but about a deliberate, tactical placement of each pole plant to ensure maximum security. As expert Dr. Baggish states, they provide a dual benefit: “They help uphill for force generation and downhill for stability.” On the final ascent, you are leveraging both of these functions simultaneously.
By using your poles to test the ground before you step and to create a wider base of support, you can navigate challenging sections with a much higher degree of confidence and safety. This allows you to conserve energy for the final push and enjoy the rewards of the summit.
- On the final approach, lengthen your poles slightly so the tips reach the ground earlier. This gives you a wider, more stable base and helps absorb impact before it reaches your knees.
- Plant your poles just ahead of your steps rather than directly beneath you. This provides braking power and stability on loose scree, mud, or wet ground near exposed ridgelines.
- On steep, uneven summit terrain, consider zigzagging your line of ascent instead of going straight up. Use the poles to probe each new placement for stability before committing your full body weight.
The true value of trekking poles lies in your ability to wield them as an extension of your body. The next step is to take these principles to the trail. Start by consciously practicing the tripod plant and dynamic length adjustments on your next hike. Pay attention to how your body feels as you transfer the load from your knees to your arms and core. This practice is the only way to transform knowledge into a skill that will protect your joints and keep you hiking for decades to come.