In summary:
- Treat your power and water needs as a formal “budget” to be calculated, not a rough guess to be packed.
- Engineer for resilience by anticipating failure points and building redundancy into your core systems.
- Prioritize low-impact shelter to avoid conflict and invest in satellite communicators as your ultimate safety net.
- Shift from simply finding spots to developing a repeatable methodology for discovering true, sustainable isolation.
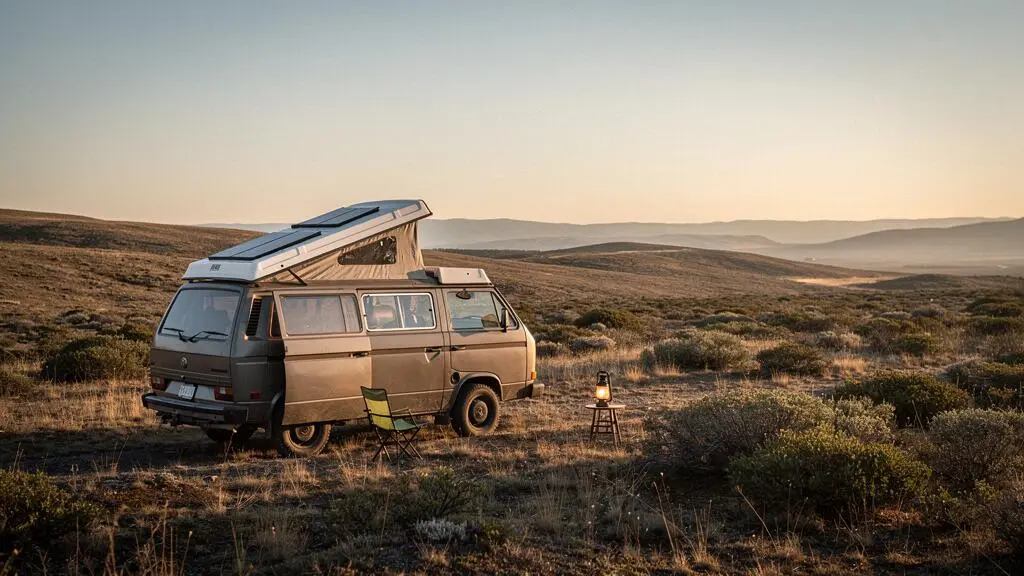
The dream of a 10-day off-grid escape—far from mobile signal, shops, and civilization—is the ultimate test of self-reliance. Many guides offer simple packing lists, advising you to “bring enough water” or “have a backup power source.” But this approach often leads to critical failures in the field. True wilderness independence isn’t achieved by packing more gear; it’s earned by designing a holistic, interconnected ecosystem of resilient systems for your vehicle and camp.
This isn’t about creating a longer checklist. It’s about adopting a new mindset: systems thinking. We will move beyond itemizing supplies and instead focus on engineering the core pillars of off-grid survival: power, water, food preservation, and communication. Each element will be treated as a subsystem with its own inputs, outputs, and potential failure points. You will learn to calculate your energy budget with precision, understand the real-world challenges of water management, and build in the redundancies that turn a potentially trip-ending problem into a minor inconvenience.
By understanding how these systems interact, you can build a truly self-sufficient mobile basecamp. This guide provides the strategic framework to anticipate challenges and equip you with the knowledge to thrive, not just survive, when you are completely on your own.
Contents: A Systems Approach to Off-Grid Independence
- How to Size Your Solar Array to Power Fridge, Lights and Devices for 7 Days Without Sun
- How to Carry and Filter 100 Litres of Water for a 2-Week Remote Camping Trip
- Portable Solar Panels or Fixed Roof Array: Which Suits Off-Grid Van Camping Better
- The Fridge Failure Mistake That Wastes £80 of Food on 40% of Off-Grid Trips
- How Many Days Can You Safely Camp Off-Grid Alone Before Risk Outweighs Reward
- Bivvy Bag or Tent: Which Wild Camping Shelter Avoids Legal and Social Conflicts
- How to Set Up a Garmin InReach for Two-Way Messaging Without Any Mobile Signal
- How to Find Truly Isolated Camping and Parking Spots Away From All Human Activity
How to Size Your Solar Array to Power Fridge, Lights and Devices for 7 Days Without Sun
The foundation of any extended off-grid trip is a resilient power system. A common mistake is to buy a solar panel and battery based on marketing claims rather than a calculated energy budget. This oversight is a primary failure point. As one expert notes, this is a frequent issue. An off-grid preparedness specialist at Home Resilience Hub states:
After 12 years of emergency management and hundreds of nights off-grid, I’ve seen more “dead batteries” due to undersized solar than any other equipment failure.
– Off-grid preparedness specialist, Home Resilience Hub – What Size Solar Panel Do I Need for Camping?
To avoid this, you must perform a detailed audit of your daily energy consumption, measured in watt-hours (Wh). Think of it as a financial budget: you can’t spend what you don’t have. Start by listing every device you’ll use, from your 12V fridge to your phone charger. For each, determine its power draw in watts and the number of hours it will run per day. The fridge is often the biggest consumer; its daily Wh usage is its running watts multiplied by 24 hours and then by its duty cycle (e.g., 0.3 for 30% of the time). Summing these up gives you your total daily Wh need. Only then can you correctly size a battery and solar array that provides a genuine safety margin for sunless days.
Action Plan: Calculate Your Off-Grid Energy Budget
- Calculate daily Wh need: Sum fridge running watts × 24 hours × duty cycle, plus fan/lights watts × hours/day, plus device Wh per charge × charges/day, plus cooking Wh/day.
- Estimate daily solar yield: Panel rated watts × effective sun hours (e.g., 4.5) × real-world loss factor (e.g., 0.7).
- Determine required usable energy: Subtract daily solar yield from daily Wh need, then multiply by your target number of sunless days.
- Calculate gross battery capacity: Divide usable energy by 0.9 (for LiFePO4 depth-of-discharge) and multiply by 1.25 for a cloudy-day and inverter-loss safety margin.
This calculation transforms guesswork into a clear specification. It dictates the minimum Amp-hour (Ah) rating for your battery bank and the required wattage of your solar array, ensuring you reach your independence threshold even with a week of solid cloud cover.
How to Carry and Filter 100 Litres of Water for a 2-Week Remote Camping Trip
After power, water is the most critical resource to manage for self-sufficiency. The common advice to “bring one gallon per person per day” is a dangerous oversimplification. A proper water budget, much like an energy budget, requires a more granular approach. You must break down your water needs into functional categories: drinking, cooking, and hygiene. Failing to do so can lead to premature depletion of your supply, forcing an early end to your trip.
For a 10-day trip for two people, your needs quickly escalate. A detailed water budget might look like this:
- Drinking Water: 3-4 litres per person per day = 60-80 litres total.
- Cooking Needs: Budgeting 0.75 to 1.0 litres per person per day for rehydrating food and washing utensils adds another 15-20 litres.
- Hygiene: Allocating 0.5 litres per person per day for tasks like brushing teeth brings the total up by 10 litres.
Suddenly, your 100-litre target seems less like an excess and more like a carefully calculated necessity. As one camping resource illustrates, the weight and volume become significant factors even on shorter trips; a group of four on a three-day trip needs around 96 litres, highlighting why a precise budget is vital for a longer 10-day expedition. This volume necessitates a two-part system: a primary onboard storage tank for clean water and a robust, high-volume filtration system to process water from natural sources like rivers or lakes. A quality filter with a high flow rate is not a luxury; it’s a critical piece of redundancy that extends your range indefinitely.
Carrying capacity is a limiting factor. Use a mix of fixed tanks and durable, collapsible water carriers to optimize space. Always treat found water sources with a multi-stage filter that removes particulates, bacteria, and protozoa to avoid illness, which is a catastrophic failure point in a remote setting.
Portable Solar Panels or Fixed Roof Array: Which Suits Off-Grid Van Camping Better
Once you’ve calculated your energy budget, the next strategic decision is how to generate that power. The choice between fixed, roof-mounted panels and portable, deployable panels isn’t just about convenience; it’s a core component of your resilience engineering. Each system has distinct advantages that serve different off-grid philosophies. A fixed array is the ultimate “set and forget” solution. Once installed, it’s always working, passively charging your batteries whenever there’s daylight. The available 400–1200W of roof space alone on most vans and RVs often dictates the scale, providing a consistent and reliable power source without any daily setup.
However, this convenience comes with a constraint: your vehicle must be parked in the sun. This can turn your living space into an oven on hot days. This is where portable panels offer crucial flexibility. They allow you to park your vehicle in the shade while placing the panels in direct sunlight, optimizing both your comfort and your power generation. Many seasoned off-gridders adopt a hybrid approach, using a fixed array as the primary workhorse and supplementing it with a portable panel for an extra boost or when parked in a suboptimal location. This redundancy is the hallmark of a well-designed system. As the RV Parts Giant editorial team advises, even the wiring method is a strategic choice:
Wire panels in series to keep current (and cable size) down on longer runs, or in parallel to keep working if one panel is shaded.
– RV Parts Giant editorial team, RV Solar Panel Buying Guide
The ideal system depends on your travel style. If you’re constantly on the move, a fixed array is more efficient. If you plan to set up a basecamp for several days at a time, the flexibility of portable panels becomes invaluable. For ultimate self-sufficiency, a hybrid system provides the best of both worlds.
The Fridge Failure Mistake That Wastes £80 of Food on 40% of Off-Grid Trips
A 12V compressor fridge is a game-changer for long-duration trips, allowing for fresh food far from any shop. However, it’s also a major failure point. The most common mistake isn’t just an undersized power system; it’s poor thermal management. Simply throwing food into the fridge and hoping for the best leads to massive energy waste and spoilage. A fridge running constantly because it’s fighting to cool warm items or has poor airflow can single-handedly drain your battery bank, leading to the loss of your perishable food—a costly and morale-damaging event.
Effective fridge management is a system in itself. The first principle is to pre-cool everything. Load your fridge at home while connected to shore power, ensuring its contents and the fridge itself are at the target temperature before you even start your engine. Secondly, think like a supermarket stocker: organize your food into zones. Items you access frequently should be near the top, while raw meats and other high-risk items should be sealed and placed at the bottom, where the temperature is most stable.
Finally, respect the laws of thermodynamics. Pack your fridge tightly, using any empty space to store bottles of water. This “thermal mass” helps the fridge retain cold, reducing the number of times the compressor needs to kick in. Avoid placing warm items, like a recently-bought drink, directly into a cold fridge; let it cool to ambient temperature first. Each time you open the lid, you lose cold air, so plan your meal prep to minimize access. This disciplined approach to cold-chain management is as important as the solar panels powering it.
A well-managed fridge not only saves your food but also dramatically reduces the load on your power system, freeing up precious watt-hours for other uses and extending the resilience of your entire off-grid setup.
How Many Days Can You Safely Camp Off-Grid Alone Before Risk Outweighs Reward
The question of how long you can safely stay off-grid alone doesn’t have a single answer; it’s a dynamic risk assessment. The “independence threshold” is the duration your systems can sustain you without any external input or assistance. For a 3-day trip, minor gear failures are an inconvenience. For a 10-day solo expedition, they can become a serious safety issue. The primary factor determining your safe duration is the robustness and redundancy of your core life-support systems: power, water, and communication.
Before embarking on a long solo trip, conduct a failure point analysis. What happens if your water filter clogs? Do you have a backup purification method, like tablets or a UV sterilizer? What if your primary battery fails? Do you have a separate, isolated power source to run your satellite messenger? The more “single points of failure” you have, the shorter your safe duration. A truly resilient setup might include two separate water containers and two different filtration methods, or a main house battery and a small, portable power station dedicated solely to emergency communications.
Psychological resilience is another key factor. Extended solitude can be mentally taxing. Your ability to problem-solve calmly under pressure is paramount. Before a 10-day trip, undertake shorter solo trips of 3 and 5 days to test both your gear and your mental fortitude. This incremental approach allows you to identify weaknesses in your systems and your mindset in a lower-risk environment. The reward of true solitude is immense, but it must be earned through meticulous preparation and an honest assessment of your capabilities.
Ultimately, safety is not about eliminating all risk, but about understanding it and mitigating it through intelligent system design. When your preparation is thorough, you can confidently extend your time in the wilderness, knowing you have a plan for when things go wrong.
Bivvy Bag or Tent: Which Wild Camping Shelter Avoids Legal and Social Conflicts
Choosing a shelter for wild camping involves more than just weather protection; it’s a strategic decision that impacts your legal and social footprint. In many areas, “wild camping” exists in a legal grey area. The key to avoiding conflict is to be as discreet and low-impact as possible. This is where the choice between a traditional tent and a minimalist bivy bag becomes critical. A tent, with its larger size and vertical profile, is far more visible and often perceived as “setting up camp,” which can attract unwanted attention from landowners or authorities.
A bivy bag, on the other hand, excels at discretion. It’s essentially a waterproof cover for your sleeping bag, creating a minimal, ground-hugging silhouette. This allows you to tuck yourself away out of sight, behind natural cover. As the team at Live Travel City puts it, this makes it the ideal tool for stealth:
A bivy bag is the gold standard: it sits close to the ground, has a tiny silhouette, and can be tucked behind a fallen log or inside a thicket.
– Live Travel City editorial team, Stealth Camping: The Complete Guide to Sleeping Anywhere Without Getting Caught
This low profile aligns perfectly with the principles of responsible wild camping: arrive late, leave early, and leave no trace. Furthermore, adhering to local guidelines is crucial. For instance, in many parts of the US, typical dispersed-camping rules require staying set distances from water sources and roads (e.g., 100-150 ft) and often impose stay limits of around 14 days. A bivy setup makes it easier to comply with these “out of sight” expectations and minimizes your environmental impact.
While a tent offers more comfort and space, a bivy bag provides a superior system for avoiding conflict and achieving a more intimate connection with the wilderness. For the dedicated solo adventurer focused on self-sufficiency and minimal impact, the bivy is often the more strategic choice.
How to Set Up a Garmin InReach for Two-Way Messaging Without Any Mobile Signal
For any trip that takes you beyond mobile reception, a satellite messenger is the most critical piece of safety equipment you can carry. It is the ultimate communication redundancy, your lifeline to the outside world. Devices like the Garmin inReach use the Iridium satellite network to provide two-way text messaging, location tracking, and, most importantly, an SOS button that connects you to a global emergency response coordination center. This is not a luxury; for a 10-day solo trip, it’s an essential component of your risk mitigation system.
However, simply buying the device is not enough. Proper setup and testing before you leave are non-negotiable. Many users make the mistake of unboxing it just before their trip, only to find the subscription isn’t active or they don’t know how to use it. You must activate your device and select a subscription plan that covers your entire trip duration well in advance. Then, you need to configure it for effective two-way communication.
Your Pre-Departure Garmin InReach Setup Checklist
- Pair your smartphone with the inReach device via the companion app before departure to enable easier on-screen typing for custom messages.
- Activate the device and confirm the satellite subscription plan covers the full duration of your trip, including a buffer.
- Test sending both a preset message and a fully custom text message from a location with a clear view of the sky to confirm the two-way link is working.
- Share your device’s unique contact method with your designated emergency contacts so they know exactly how to initiate a message or reply to you.
By preparing your inReach correctly, as detailed in Garmin’s official support documentation, you ensure that this powerful tool is ready to perform when you need it most. You give your loved ones peace of mind and provide yourself with a reliable link to help, no matter how far you roam.
Key Takeaways
- Think in Systems, Not Lists: True self-sufficiency comes from designing interconnected systems for power, water, and communication, not just packing more gear.
- Budget Your Resources: Calculate your daily watt-hour and water needs with precision. This data-driven approach is the foundation of a resilient off-grid plan.
- Engineer for Failure: Identify every single point of failure in your setup and build in redundancy. One is none, and two is one.
How to Find Truly Isolated Camping and Parking Spots Away From All Human Activity
The final piece of the self-sufficiency puzzle is applying your preparation to find the ultimate reward: true isolation. With robust power, water, and communication systems, you are no longer tethered to crowded campsites. But finding genuinely secluded spots—far from road noise and other people—requires a methodology, not just an app. The best spots are never listed on a public database. You must develop a system for discovering them yourself using digital mapping tools.
Start with a base layer of satellite imagery, such as Google Maps’ satellite view. Scan vast areas of public land—National Forests, Bureau of Land Management (BLM) areas, or equivalent public lands in your region—for signs of access. Look for faint dirt tracks, fire roads, or logging trails that branch off from main roads. These are your potential entry points. Cross-reference these tracks with a topographic layer. A topographic map shows contour lines, revealing the steepness of the terrain. A track that looks promising on satellite view might be impassable in reality; the topo map will show this.
Once you’ve identified a potential area, look for small clearings, pull-outs, or dead-end spurs off the main track. These are often ideal for setting up a discreet camp. Pay close attention to the surrounding vegetation on the satellite view. Is there tree cover to park under for shade? Is it a sparse, open area where you’ll be exposed? Finally, always verify land ownership and regulations. Use apps like onX Offroad or Gaia GPS which have layers showing public vs. private land boundaries. This research, done from home, allows you to build a portfolio of potential spots, complete with GPS coordinates, so that when you’re in the field, you’re exploring with a plan, not just wandering aimlessly.
The next step is to move from theory to practice. Begin mapping out the power, water, and communication systems for your own vehicle. By applying this systems-thinking approach, you transform your preparation from a chore into an empowering act of engineering your own freedom.