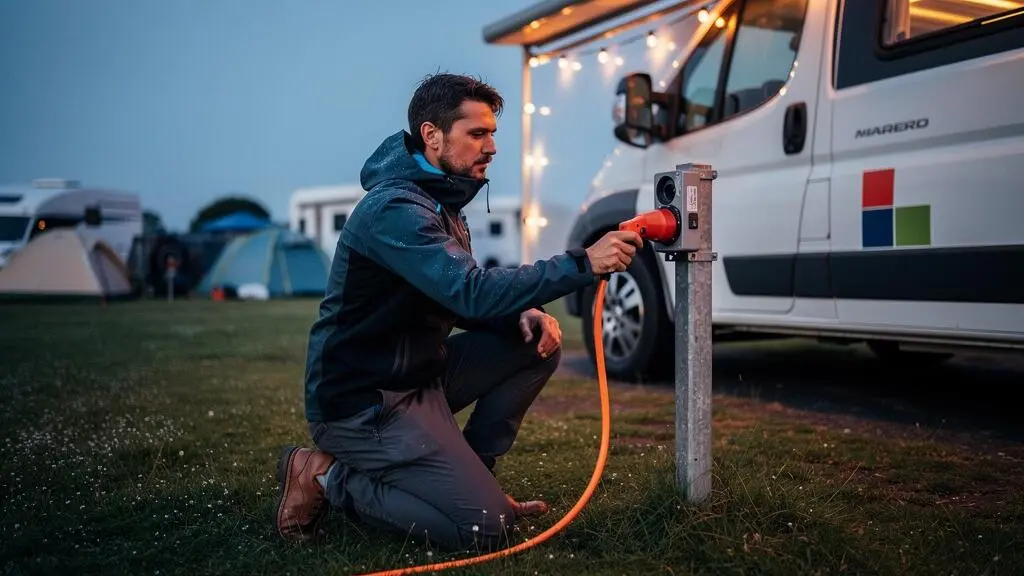
In summary:
- Treat your campsite hookup like a strict electrical budget, not an infinite power source. A standard 10-amp supply provides about 2,300 watts.
- Before plugging anything in, add up the wattage of all your appliances to ensure you don’t exceed the hookup’s limit.
- Never trust a power post. Always use a quality, heavy-gauge outdoor cable and test the socket for faults with a polarity tester or EMS before connecting your vehicle.
- Distance matters. The farther your pitch is from the power post, the greater the voltage drop, which can damage sensitive electronics.
- Mastering your power needs for off-grid camping is the ultimate training for using limited on-grid hookups efficiently and safely.
The familiar, sudden silence. The lights go out, the heater stops humming, and you’re plunged into darkness and cold. A quick look reveals the culprit: the circuit breaker on the campsite’s electric hookup post has tripped again. It’s a moment of pure frustration for any camper who relies on electricity. You’ve likely been told the standard advice: “don’t run too many things at once” or “unplug the kettle before using the microwave.” While not wrong, this advice is incomplete. It treats the symptom, not the cause.
The core issue is a misunderstanding of the fundamental nature of campsite power. A hookup isn’t a miniature power station; it’s a connection to a shared grid with a very strict, non-negotiable limit. Simply guessing which appliances you can run together is a recipe for failure and, in the worst-case scenario, expensive damage to your sensitive electronics like chargers, laptops, and TV sets. The key isn’t to use less power, but to understand and manage your consumption with precision.
This guide will shift your perspective. We will move beyond guesswork and into the realm of simple, effective electrical management. You will learn to think not as a consumer of power, but as the manager of a strict electrical budget. We’ll demystify the numbers on your appliances, explain why your gear is failing, and provide a clear, step-by-step framework for using any campsite hookup with confidence. You’ll understand the critical difference between a cheap extension cord and a safe connection kit, and why sometimes the best-looking pitch is the worst choice for your equipment.
This article provides a comprehensive roadmap to mastering campsite power. By following the structured sections below, you will learn to calculate your needs, select the right equipment, and implement safety checks that will protect both your gear and your peace of mind on every trip.
Summary: A Camper’s Guide to Mastering Campsite Electrical Systems
- Why Running Kettle and Heater Together Trips Your 10A Campsite Hookup Every Time
- How to Add Up Your Equipment Wattage to Avoid Exceeding Hookup Amp Limits
- Campsite Electric Cable or Your Own Hookup Kit: Which Ensures Safer Connection
- The Hookup Wiring Mistake That Fries Chargers and Laptop Power Supplies
- Should You Choose Pitches Close to Hookup Posts or Prioritise Location and Views
- How to Size Your Water Tanks and Battery Bank for 5 Days Without Hookups
- How to Size Your Solar Array to Power Fridge, Lights and Devices for 7 Days Without Sun
- How to Prepare for 10 Days Off-Grid Without Hookups, Shops or Mobile Signal
Why Running Kettle and Heater Together Trips Your 10A Campsite Hookup Every Time
The most common cause of a tripped breaker is simple electrical overload. You’ve asked the system to deliver more power than it’s designed to handle. Think of it as a budget. On most UK and European campsites, a standard hookup is rated at 10 amps (10A). This isn’t an arbitrary number; it translates directly into a total power budget. The formula is Watts = Volts x Amps. With a 230V supply, this means a 10A hookup gives you a total of 2,300 watts (2.3kW) to “spend.” Analysis shows that on a typical 10A supply you have access to around 2.3 kW of total power. This is your entire budget for everything running simultaneously.
Now, consider the “cost” of your appliances. A typical electric camping kettle can draw 1,000 to 1,500 watts. A small fan heater might consume 1,500 to 2,000 watts on its higher setting. If you run both, your total demand could be 3,000 watts or more—far exceeding your 2,300-watt budget. The breaker, an essential safety device, does exactly what it’s supposed to do: it cuts the power to prevent the wiring from overheating and causing a fire. It’s not faulty; it’s enforcing your budget.
Some appliances, particularly those with motors or compressors like air conditioning units, have an even higher “inrush current” at startup. As one expert at RVelectricity notes, “an A/C can easily draw in excess of 50 amps of inrush current for a few hundred milliseconds during compressor startup.” While you might not be running a full AC unit, the principle applies: this initial surge can be enough to trip a breaker that’s already close to its limit from other devices, creating that frustrating and instantaneous power cut.
How to Add Up Your Equipment Wattage to Avoid Exceeding Hookup Amp Limits
To avoid tripping the breaker, you must become the accountant of your own electrical budget. This means moving from guessing to calculating. The process is straightforward: find the wattage of each device you intend to use and add them up. This figure is your “total load,” which must stay below the hookup’s maximum wattage. You can usually find the wattage (W) printed on a label on the appliance itself, its power brick, or in its manual. If it only lists amps (A) and volts (V), you can calculate the wattage yourself using the formula: Watts = Volts x Amps.
The budget you have to work with varies significantly based on the hookup provided. While a 10A (2,300W) hookup is common, larger RVs and premium pitches in the US and some parts of Europe may offer more. For example, a 30-amp plug gives about 3,600 watts, while a 50-amp plug can provide up to 12,000 watts. Knowing which type of supply you’re connected to is crucial for determining your total available power. Never assume; always check the post.
A simple audit before you even boil the kettle can prevent most issues. By knowing the “cost” of each item—a laptop charger (65W), a TV (100W), fridge compressor (150W), microwave (1200W)—you can make informed decisions. You’ll quickly see that you can run your lights, TV, and charge your devices without issue, but adding a high-wattage item like a heater requires you to temporarily “switch off” other significant loads. It’s a conscious trade-off, not a game of chance.
Your Action Plan: Daily Wattage Audit
- List every electrical device and appliance you plan to run simultaneously, from the water heater to phone chargers.
- Inspect each item’s data label or power brick to find its consumption in watts (W). If only amps (A) are listed, multiply by the voltage (e.g., 230V or 120V) to get watts.
- Create a “high-draw” list (kettle, heater, microwave, hairdryer) and a “low-draw” list (chargers, lights, TV).
- Before using a high-draw item, check what else is running. The sum of all active appliances must not exceed your hookup’s total wattage (e.g., 2,300W for 10A).
- Make a conscious decision to turn off one high-draw appliance before starting another to stay within your power budget.
Campsite Electric Cable or Your Own Hookup Kit: Which Ensures Safer Connection
The physical link between the power post and your vehicle is a critical component of your electrical system, and not all cables are created equal. Using a standard household extension cord is a dangerous mistake. These cords are not designed for the high, sustained loads of camping, nor are they built to withstand the outdoor environment. They can overheat, melt, and create a significant fire risk. A proper hookup cable is a non-negotiable piece of safety equipment. For reliability, experts recommend a heavy-duty outdoor cable with 2.5 mm² three-core wiring, ideally around 25 metres long to reach distant posts.
As the image shows, the thickness of the copper cores and the quality of the insulation are what allow the cable to handle a continuous 10A or 16A load safely without overheating. However, a good cable is only the first step in building a truly safe connection. The power from a campsite post can be “dirty,” with voltage spikes or wiring faults that can destroy your sensitive electronics. A basic cable offers zero protection against this.
This is where a layered approach to safety comes in. Moving beyond a simple cable to a dedicated hookup kit provides increasing levels of protection. A basic surge protector can guard against high-voltage spikes, but as the Camping World Editorial Team points out, a more advanced solution is often necessary: “An electrical management system is a more comprehensive solution that also protects against low voltage, open neutral, open ground, and reverse polarity, all of which can be equally damaging.” An Electrical Management System (EMS) is the gold standard, actively monitoring the power and cutting it off before it can do harm.
The following table breaks down the tiers of protection, allowing you to assess your own setup and decide what level of risk is acceptable.
| Tier | Setup | Protects Against |
|---|---|---|
| Good | Correctly rated, heavy-gauge outdoor cable | Overheating and cable failure only |
| Better | Quality cable + plug-in polarity tester + basic surge protector | High-voltage surges and visible wiring faults |
| Best | Full Electrical Management System (EMS) | Surges, low/high voltage, reverse polarity, open neutral, open ground |
The Hookup Wiring Mistake That Fries Chargers and Laptop Power Supplies
The most insidious threat to your equipment isn’t an overload you cause, but a pre-existing wiring fault at the power post. Issues like reverse polarity, open neutral, or open ground are invisible and can instantly destroy sensitive electronics the moment you plug them in. Reverse polarity is particularly dangerous. As the Fulfilling Travel Editorial Team explains, with “incorrect wiring (hot and neutral wires connected to the wrong terminals)… current can flow through the hot wire from the power source into your RV appliances and electronics” in a way they are not designed to handle. This can fry circuit boards in an instant.
Another critical fault is an “open neutral.” This can create unstable voltages that are lethal for modern electronics. A high-quality Electrical Management System (EMS) is designed to detect these problems. In fact, a key safety feature is that if the source has an open neutral condition, a proper protection device will not light up and will not allow any power through, effectively saving your gear from the faulty supply. This is why you should never, ever trust an untested power post. The small investment in a tester or an EMS is cheap insurance compared to the cost of replacing a laptop, TV, or the vehicle’s entire charging system.
The simple act of testing the post before you connect your main cable should be a mandatory step in your setup routine. It takes less than a minute and is the single most effective action you can take to prevent catastrophic electrical damage. The peace of mind it provides is priceless.
Your Checklist: How to Safely Test a Power Post Before Connecting
- Ensure all major electrical appliances inside your van or RV are switched off at the device.
- At the power post, locate the correct outlet for your cable and ensure its corresponding circuit breaker is flipped to the “OFF” position.
- Plug only your circuit tester or Electrical Management System (EMS) into the outlet. Do not connect your main vehicle cable yet.
- Flip the breaker on the post to the “ON” position. Observe the diagnostic lights or display on your tester.
- Confirm that the tester shows a “Correctly Wired” or “All OK” status. If it indicates any fault (Reverse Polarity, Open Neutral, etc.), do not use the post. Report the fault to the site management and move to a different pitch if necessary. Only plug in your main cable after confirming the post is safe.
Should You Choose Pitches Close to Hookup Posts or Prioritise Location and Views
Choosing a pitch often feels like a trade-off between a beautiful view and practical convenience. When it comes to electricity, however, that “convenience” has a technical dimension: distance. The farther your vehicle is from the power post, the longer your cable needs to be, and this introduces a phenomenon called voltage drop. As electricity travels down a cable, it loses a small amount of energy, which manifests as a drop in voltage. The longer the cable and the higher the load, the more significant this drop becomes.
While a small drop is normal, a large one can be harmful. Modern electronics are designed to run within a specific voltage range. If the voltage drops too low, they can malfunction, underperform, or even suffer permanent damage. A heavy-gauge cable minimises this effect, but it cannot eliminate it. For instance, data shows that even a 12 AWG copper cord carrying 15A loses about 4.8V over 100 feet, roughly a 4% drop. Using a thinner, longer, or lower-quality cable will result in a much more severe drop, starving your appliances of the stable power they need.
The problem is compounded on a busy campsite, especially during peak demand times like a chilly evening when everyone switches on their heaters. The cumulative load on the campsite’s grid can cause the overall supply voltage to sag. If you are already at the end of a long cable run, this grid-wide sag can push the voltage at your vehicle into the danger zone. This isn’t theoretical; it’s a real-world problem. One camper shared a stark experience:
Our watchdog reported 99 volts as the entire campground plugged in their electric heaters one chilly night in desert hot springs, CA; it had cut us off at 117 volts.
– Commenter, RVelectricity Substack
This demonstrates that while the scenic pitch at the far end of the field is tempting, the closer, less glamorous spot next to the power post is often the electrically superior and safer choice for your equipment.
How to Size Your Water Tanks and Battery Bank for 5 Days Without Hookups
Preparing for an extended trip without hookups—often called “boondocking” or wild camping—is the ultimate test of resource management. While water capacity is a separate challenge, sizing your battery bank requires the exact same “electrical budget” mindset used for on-grid camping, but with higher stakes. Here, your “supply” is not the campsite post, but the finite energy stored in your leisure batteries. The goal is to build a system that can sustain your needs for a set period, with a safe margin for error.
The process begins, once again, with a thorough audit of your power consumption. You need to calculate your total daily energy use in watt-hours (Wh) or amp-hours (Ah). This is more detailed than a simple wattage check, as it accounts for how long you use each appliance. For example, a 60W fridge running for 8 hours a day consumes 480 Wh (60W x 8h). You must perform this calculation for every single electrical item, from lights to water pumps to device chargers, to arrive at an honest daily total.
Once you know your daily consumption, you can size your battery bank accordingly. A crucial rule for lead-acid batteries is the 50% depth-of-discharge limit; regularly draining them further will drastically shorten their lifespan. This means if your daily need is 100Ah, you need at least 200Ah of lead-acid battery capacity to cover one day safely. For a five-day trip without any means of recharging, you would theoretically need 1000Ah of battery capacity, which is often impractical. This is why most off-grid systems incorporate a way to replenish the batteries, such as solar power.
Action Plan: Sizing Your Off-Grid Power Buffer
- Calculate your total daily energy consumption in watt-hours (Wh) by multiplying each device’s wattage by its daily hours of use and summing the results.
- To survive a day without any charging, size your battery bank to be roughly 1.5 times your total daily watt-hour need. This provides a safety buffer.
- If you have a charging source like solar, size it to be able to replenish 100% of your daily energy consumption within an average of 5 peak sun hours.
- Ensure your system’s inverter and battery can handle the short, high-draw demands of appliances like a microwave, so you don’t have to rely on a generator or hookup for a quick task.
How to Size Your Solar Array to Power Fridge, Lights and Devices for 7 Days Without Sun
Integrating a solar array into your setup transforms your vehicle from a simple power consumer into a miniature, self-sustaining power station. However, the dream of “infinite” free power from the sun is tempered by reality: clouds, short winter days, and the angle of the sun all impact performance. Sizing your solar array and battery bank to survive a prolonged period without sun requires a conservative, worst-case-scenario approach.
The relationship between your solar panel capacity (measured in watts) and your battery bank storage (measured in amp-hours) is key. A common rule of thumb for a balanced system is that at least 1.5 watts of solar panel output is recommended for every 1 amp-hour of battery capacity. For a 400Ah battery bank, this would suggest a 600W solar array. This ratio ensures that on a good sunny day, your panels can effectively replenish the energy you’ve used.
To prepare for “7 days without sun,” you are not sizing your solar array, but rather your battery bank. The solar array becomes irrelevant if there’s no sun. In this scenario, you would calculate your daily energy need (e.g., 1,200 Wh) and multiply it by seven, giving a total need of 8,400 Wh. You would then need a battery bank large enough to supply this total amount without dropping below its safe discharge level. For lithium batteries (which can be discharged to 80-90%), this would mean a battery bank of around 10,000 Wh (or roughly 800Ah at 12V). This is a substantial and expensive setup, highlighting that true energy independence requires significant investment.
A more practical approach for most campers is to size the system based on average use and weather, and have a backup plan (like a generator or plans to drive to a hookup) for prolonged bad weather. The following tiers provide a realistic starting point for system sizing.
- Light Weekend Use (lights, phone, fan): 200–400W of solar with 100–200Ah of battery.
- Moderate Off-Grid Use (fridge, laptop, TV): 400–800W of solar with 200–300Ah of battery.
- Full-Time Boondocking: 800–1,200W of solar with 300–400Ah of lithium storage.
- Winter/Low-Sun Margin: Always add extra capacity, as solar production can drop by 30–60% in winter due to shorter days and a low sun angle.
Key takeaways
- Budget, Don’t Guess: A 10A hookup is a finite 2,300-watt budget. Calculate the wattage of your appliances to avoid “overspending” and tripping the breaker.
- Gear is Your Insurance: Never use a household extension cord. Invest in a heavy-duty outdoor cable, a polarity tester, and ideally a full Electrical Management System (EMS) to protect your gear.
- Test Before You Trust: Always test the power post for faults like reverse polarity *before* plugging in your main cable. It’s the single best way to prevent expensive damage.
How to Prepare for 10 Days Off-Grid Without Hookups, Shops or Mobile Signal
Preparing for true self-sufficiency over 10 days is the ultimate expression of the “electrical budget” mindset. Every watt-hour counts, and there’s no margin for error or waste. This level of planning forces a deep, honest appraisal of your actual needs versus your wants. The discipline you learn here pays dividends even when you return to the relative luxury of a campsite hookup, as you’ll be instinctively more efficient with power. The first step is to establish an unassailable, data-driven daily energy budget. Estimates show a weekend boondocking setup drawing roughly 880 Wh per day can rise to about 1,400 Wh per day for a full-timer without air conditioning.
For a 10-day trip, this means you need to budget for a total of 14,000 Wh (1.4 kWh x 10 days). Your system—a combination of battery storage and recharging capability (solar, generator)—must be able to meet this demand. If you are relying solely on batteries, you must account for the depth-of-discharge limits. A lead-acid battery, for example, should not be regularly discharged below 50% of its rated capacity. This means to get 100 usable amp-hours, you need a 200 amp-hour battery. This critical detail doubles the required size and weight of your battery bank compared to a more expensive but efficient lithium setup.
This rigorous off-grid budgeting is the best possible training for on-grid efficiency. When you know, intimately, that your water pump costs 4Ah per day and your TV costs 10Ah, you become much more mindful of leaving things on. You start to see the blinking standby light on an appliance not as a convenience, but as a needless drain on your precious power budget. This mindset is the key to a stress-free electrical experience, whether you’re in the wilderness or on a fully-serviced pitch.
Your Action Plan: Building an Honest Off-Grid Power Budget
- List every single electrical load you expect to run daily, from the water pump to your phone charger. Calculate and add up their consumption to get a realistic amp-hour (Ah) budget for a 24-hour period.
- If using lead-acid batteries, remember they should not be discharged below 50% of their rated capacity. Double your calculated daily need to find the true minimum size for your battery bank.
- When sizing your total battery bank, always factor in this depth-of-discharge limit. Your “usable” capacity is only half the rated capacity for lead-acid, and about 80-90% for lithium.
- Treat the discipline of creating and living on this strict off-grid budget as invaluable training. It will make you instinctively smarter and more efficient when you plug into a limited 10A campsite hookup.
Now that you are armed with the knowledge to calculate your electrical budget, select the right safety gear, and test your connection, you have the power to eliminate frustrating trips and protect your valuable equipment. The next time you pull into a campsite, you won’t be guessing; you’ll be executing a plan. Put these strategies into practice on your next trip to experience a truly seamless and safe connection.