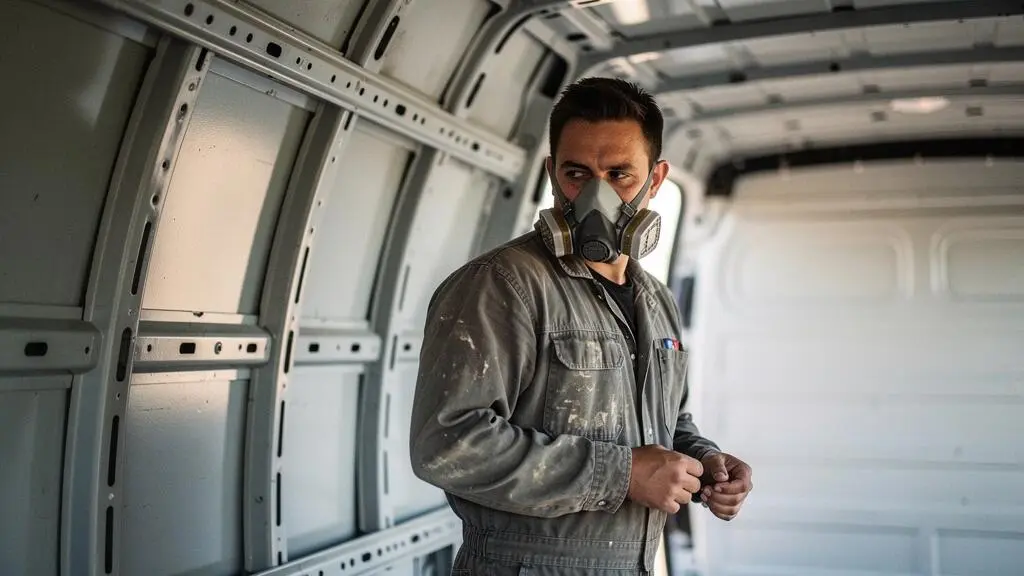
The key to a moisture-free, four-season van is not the spray foam itself, but mastering its application by understanding the physics of condensation and air sealing.
- Closed-cell foam is the only choice because it acts as a vapor retarder, bonding directly to the van’s metal skin to prevent humid interior air from reaching the cold surface and condensing.
- Critical mistakes include improper panel prep, applying foam too thick (diminishing returns), and spraying over essential drainage points, which can lead to hidden rust and panel damage.
Recommendation: Prioritize creating a continuous, monolithic seal and managing thermal bridges over simply chasing the highest R-value. This guide explains how.
The dream of a four-season camper van—cozy in the winter chill and cool in the summer heat—often shatters against a single, silent enemy: condensation. Many converters meticulously install traditional insulation like wool or fibreglass, only to find dampness, mould, and eventually rust ruining their hard work. The common advice is to “use a vapor barrier,” but this often creates more problems than it solves, trapping moisture in the worst possible places.
The conversation around van insulation is fixated on R-values, but this misses the fundamental point. The real challenge in a metal box is not just slowing heat transfer; it’s controlling the dew point. It’s about preventing the warm, moist air you create by breathing, cooking, and living from ever touching the cold outer skin of the van. This is a battle of physics, not just materials.
But what if the solution wasn’t just to pick the right material, but to fundamentally change how the insulation interacts with the vehicle structure? This is where closed-cell spray foam enters the picture, not as just another insulator, but as a complete environmental control system. Its true power lies in its ability to create a monolithic, air-tight seal bonded directly to the van’s interior. This guide moves beyond the basics. We will not just tell you how to spray foam; we will explain the science behind why each step is critical to avoid the irreversible mistakes that plague so many builds, from adhesion failure to hidden rust.
This article will deconstruct the process, focusing on the technical details that separate a dry, comfortable van from a damp, rusting liability. We will cover why closed-cell foam is physically superior, how to prepare your van for a permanent bond, how to decide between a DIY kit and a professional install, and how to manage the critical details like foam thickness, wiring, and the often-overlooked thermal bridges.
Summary: A Van Specialist’s Guide to Spray Foam Insulation Without Trapping Moisture
- Why Closed-Cell Spray Foam Prevents Condensation Where Wool and Fibreglass Fail
- How to Clean and Prime Van Panels Before Foam Application for Permanent Bonding
- DIY Spray Foam Kits or Professional Installers: Which Delivers Better Value
- The Foam Thickness Mistake That Adds 80kg and £300 Without Thermal Benefit
- What Van Areas Should Never Receive Spray Foam to Avoid Rust and Drainage Issues
- The Critical Role of Air-Sealing: Why a Monolithic Seal Is More Important Than R-Value
- How to Properly Run Wires Before You Insulate to Avoid Electrical Shorts and Overheating
- How to Keep Your Van Habitable in -5°C Winters and 30°C Summers Without Excessive Energy
Why Closed-Cell Spray Foam Prevents Condensation Where Wool and Fibreglass Fail
To understand why closed-cell spray foam is the superior choice for a van, you must stop thinking about insulation as a blanket and start thinking about it as a window. Fibreglass, wool, or even rigid foam boards are like a single pane of glass in winter. They slow heat loss, but the glass itself remains cold, and warm, moist air inside will still condense on its surface. These materials are air and vapor-permeable, meaning moisture-laden air can travel right through them, hit the cold metal of the van, and turn into water. This trapped moisture leads to mould and rust, a catastrophic failure for any conversion.
Closed-cell spray foam, by contrast, is like a modern double-glazed window. It doesn’t just insulate; it creates a complete barrier. Its key property is its extremely low vapor permeability. While unfaced fibreglass has a perm rating over 100, closed-cell foam is rated around 1 perm at just two inches of thickness, making it a class II vapor retarder. It effectively stops interior water vapor in its tracks. Crucially, it’s applied as a liquid that expands and bonds directly to the van’s metal skin, creating a monolithic, airtight seal. There are no gaps, no seams, and nowhere for air to sneak through. This direct bond keeps the metal surface temperature above the dew point, physically preventing condensation from ever forming in the first place.
The table below clearly illustrates the performance differences. Open-cell foam, while also an air sealant, is highly vapor-permeable, making it a poor choice for a vehicle where the outer skin is a perfect vapor barrier. It would trap moisture against the metal just like fibreglass. This data solidifies why closed-cell foam is the only application-focused choice for total moisture prevention.
This comparison of insulation material properties highlights the unique combination of R-value and vapor impermeability found in closed-cell foam.
| Insulation Type | R-Value per Inch | Vapor Behavior |
|---|---|---|
| Closed-cell spray foam | R-6.0 to R-7.0 | Vapor semi-impermeable (<1 perm at ~1 in.) |
| Open-cell spray foam | R-3.5 to R-3.8 | Vapor-permeable (12-20 perms) |
| Fibreglass batt | R-2.5 to R-4.0 | Highly permeable, no air seal |
How to Clean and Prime Van Panels Before Foam Application for Permanent Bonding
The effectiveness of closed-cell spray foam hinges entirely on one factor: perfect, permanent adhesion to the van’s metal panels. An incomplete bond creates small air gaps between the foam and the metal. These pockets are where condensation will form, defeating the entire purpose of the insulation and creating hidden rust spots. Achieving this bond isn’t about a quick wipe-down; it’s a meticulous surface preparation process.
First, every square inch of the interior metal must be thoroughly degreased. Factory coatings, oils from manufacturing, and workshop dust create a film that prevents the foam from bonding chemically. Use a solvent-based degreaser like denatured alcohol or a panel wipe, applying it with one clean cloth and immediately wiping it dry with a second clean cloth. Do not let the solvent evaporate on its own, as it will simply redeposit the contaminants. Work in small, manageable sections, changing cloths frequently. Your goal is a “water break free” surface, where a light mist of water sheets evenly across the metal rather than beading up.
Second, for maximum adhesion, especially on smooth, new surfaces, scuffing the paint is highly recommended. Use a red Scotch-Brite pad to lightly abrade the entire surface. This creates a microscopic texture, or “tooth,” for the foam to mechanically grip onto, dramatically increasing the bond strength. After scuffing, you must perform the degreasing step again to remove all sanding dust. While some skip priming, applying a thin coat of a self-etching primer to any bare metal spots is a non-negotiable step to prevent future rust from creeping under the foam. Let the primer fully cure according to the manufacturer’s instructions before applying foam.
Case Study: The Risk of Panel Distortion
Even with perfect prep, the application technique matters. The foam expands with significant force. A couple documenting their Sprinter build noted that spraying into enclosed cavities like structural pillars without an escape route for the expanding foam can physically deform the exterior metal panels. This highlights the need to understand foam expansion and to apply it in controlled, thin layers, allowing each to partially cure before adding the next. This prevents pressure buildup and ensures the foam fills the cavity without damaging the van.
DIY Spray Foam Kits or Professional Installers: Which Delivers Better Value
The choice between a DIY spray foam kit and hiring a professional installer is a major decision point, and the best value isn’t always the lowest initial cost. DIY kits, such as those from Froth-Pak or Touch ‘n Foam, offer a way to get the benefits of closed-cell foam for a seemingly lower price. However, this path is fraught with technical challenges that can easily lead to a subpar result or costly mistakes.
The primary challenge with DIY kits is temperature control. The two chemical components (A and B) must be at an optimal temperature (typically 75-85°F or 24-29°C) to mix and react correctly. If they are too cold, the foam will not expand properly, resulting in a dense, low-R-value product that wastes material. If they are too hot, the reaction can be too fast and difficult to control. Maintaining this temperature consistently for both large tanks throughout the application process in a variable garage or driveway environment is extremely difficult. Furthermore, the spray guns included in DIY kits are far less precise than professional equipment, making it hard to achieve a consistent, even thickness.
Professional installers, on the other hand, operate with sophisticated equipment. Their rigs are designed to heat the chemicals to the precise temperature and maintain high pressure for optimal atomization and mixing at the nozzle. It’s important to understand that professional contractors typically invest in equipment that costs $60,000 to $100,000, a testament to the technology required for a perfect application. This investment ensures a consistent cell structure, maximum yield from the material, and a uniform finish. While the cost per board foot may seem higher, it includes the technician’s expertise in applying the foam to the correct depth, avoiding sensitive areas, and managing overspray.
The following table, based on industry cost analysis for spray foam, breaks down the typical expenses. For many converters, the peace of mind and guaranteed quality of a professional job provide better long-term value, eliminating the risk of a failed DIY attempt that could cost thousands to rectify.
| Method | Cost per Board Foot | Typical Kit/Project Size |
|---|---|---|
| DIY closed-cell kit | $0.80 – $1.80 | 200-600 board feet ($300-$850 kits) |
| Professional closed-cell install | $1.30 – $2.90 (installed) | Includes labor and equipment |
The Foam Thickness Mistake That Adds 80kg and £300 Without Thermal Benefit
When it comes to spray foam, more is not always better. A common and costly mistake among DIY van builders is applying the foam too thick, driven by the belief that doubling the thickness will double the insulation. While R-value is additive, its real-world benefit is subject to the law of diminishing returns. This error can easily add significant weight and cost to your build without a proportional increase in thermal comfort.
Closed-cell spray foam boasts a high R-value, typically R-6.0 to R-7.0 per inch. The first inch of foam provides a massive leap in thermal resistance over an uninsulated panel. The second inch adds the same R-value, but the *percentage improvement* in overall heat loss reduction is smaller. By the time you get to a third or fourth inch, you are adding substantial weight and cost for a marginal gain in performance, especially when other parts of the van, like windows and thermal bridges, are the primary sources of heat loss.
For most van applications in temperate climates, a target thickness of 1.5 to 2 inches (approx. 4-5 cm) on major surfaces like walls and ceilings is the sweet spot. This provides an excellent thermal break and robust vapor retarder (around R-10 to R-14) while keeping weight and cost in check. For example, going from 2 inches to 3 inches on a long-wheelbase van could add over 80kg of weight and cost an extra £300 in material, all for a thermal improvement you are unlikely to feel. That weight and budget could be better allocated to higher-quality windows or a more efficient heating system.
The goal is not maximum R-value; it’s optimal thermal performance for the entire vehicle system. A uniform, continuous 2-inch layer is far more effective than an uneven application that is 4 inches in some places and only 1 inch in others. Focus on achieving a consistent, monolithic seal at the optimal thickness to balance performance, weight, and budget.
What Van Areas Should Never Receive Spray Foam to Avoid Rust and Drainage Issues
While the goal is a monolithic seal, a critical error is to spray foam over everything. A van’s body is designed with specific channels and holes to manage water that gets inside its structure, primarily from window seals and door gaskets. Encapsulating these areas in foam can block drainage paths, trapping water against the metal and leading to catastrophic, hidden rust.
The most important areas to protect are the weep holes. These are small openings, typically found at the bottom of doors, along the base of wall cavities, and in rocker panels. They are designed to let any water that enters the internal structure drain back out. Before you even begin masking, you must locate every single one of these holes. Use a piece of wire to poke through and ensure they are clear. Mask them off completely from the inside with high-quality tape to prevent any foam from blocking them. It is far better to have a small uninsulated spot around a weep hole than to have a blocked drain.
Other critical “no-spray” zones include:
- Door mechanisms and window regulators: Covering latches, lock rods, and window tracks with foam will render them inoperable. These complex areas should be carefully masked off.
- Wiring harnesses and connectors: While individual wires can be embedded (see next section), main junction blocks and connectors must remain accessible for future diagnostics and repairs.
- Seatbelt mounting points and mechanisms: These are safety-critical components. Foam can interfere with their operation and inspection. Keep them completely clear.
- The van floor (in most cases): Most van floors have ribs and contours that also serve as part of the vehicle’s structure and drainage system. Applying spray foam directly to the floor can trap moisture and makes it impossible to detect and repair floor rust. A system of rigid foam board insulation between wooden battens is a more practical and serviceable solution for the floor.
The logic behind avoiding these areas is perfectly summarized by an experienced builder on a public forum, who addresses the common misconception of adding a second vapor barrier:
You do NOT want to add a vapor barrier. You already have one (the body of the van). You never, NEVER want two vapor barriers.
– Forum user “vic”, Sprinter-Source Forum
Spraying over a weep hole effectively creates a second vapor barrier (the foam) inside the first (the van’s outer skin), creating a perfect bathtub to hold water. Respecting the van’s designed water management system is paramount.
The Critical Role of Air-Sealing: Why a Monolithic Seal Is More Important Than R-Value
In the world of van insulation, R-value gets all the attention. Converters obsess over maximizing this number, but in doing so, they often miss the more significant factor in thermal comfort: air leakage. Uncontrolled air movement can account for a huge portion of heat loss in winter and heat gain in summer, rendering high R-values almost meaningless. This is where the primary advantage of spray foam lies—not in its R-value per inch, but in its ability to create a perfect, monolithic air seal.
Traditional insulation materials like fibreglass or wool batts do not stop air movement. Air can and does flow freely through them and around them. Every small gap between insulation batts, every opening around a structural rib, and every unsealed seam becomes a highway for air exchange with the outside. This is why a house insulated with fibreglass still requires a separate, meticulously installed air and vapor barrier wrap. In a van, recreating such a perfect barrier with sheet material is practically impossible due to the complex curves and internal structures.
This is the true genius of spray foam. It is the insulation and the air barrier in a single application. As one expert team puts it, this is its defining advantage:
Both open cell and closed cell foam seal air — this is their biggest advantage over fiberglass batts and blown-in cellulose, which insulate but do not seal.
– Rainy Roofers Editorial Team, Open Cell Vs Closed Cell Spray Foam Guide
By expanding to fill every crack and crevice and bonding directly to the substrate, it forms a continuous, seamless envelope. This monolithic seal stops drafts, convective loops within wall cavities, and vapor-laden air from reaching the cold outer skin. In fact, the Department of Energy notes that proper insulation and air-sealing can reduce heating and cooling costs by up to 15% in a home; in a small, un-aerodynamic metal box like a van, the impact of air-sealing is even more dramatic. A van with a perfect R-10 air seal from spray foam will feel significantly more comfortable and require less energy to heat or cool than one with a leaky R-15 system using batts.
How to Properly Run Wires Before You Insulate to Avoid Electrical Shorts and Overheating
One of the most irreversible mistakes in a van build is burying electrical wiring incorrectly within spray foam insulation. While embedding wires is a common practice, doing it improperly creates a significant risk of shorts, overheating, and makes future repairs or upgrades a nightmare. Once the foam is cured, accessing those wires without destroying the insulation is impossible.
The first rule is to use high-quality, appropriately-gauged automotive wire (TXl or GXL), which has a cross-linked polyethylene coating that is more resistant to heat, abrasion, and chemicals than standard PVC wire. Never embed household wiring. The second, and most critical, rule is to run all wiring inside a protective conduit. Flexible plastic conduit is inexpensive and provides a crucial layer of mechanical protection against the foam’s expansion and any future drilling or cutting into the walls. It also creates a channel that, in some cases, may allow you to pull a new wire through in the future, though this should not be relied upon.
Plan your entire electrical layout before insulation. Know where every light, socket, and appliance will be. Run all your conduits and secure them firmly to the van’s ribs or panels with cable tie mounts and high-quality adhesive. Use oversized conduits wherever possible to make pulling wires easier. For any connections or junctions that must happen inside a wall, you must use a proper, sealed junction box that remains accessible after the walls are up. Burying “floating” splices or connections inside the foam is a major fire hazard.
Finally, consider the heat-dissipating properties of foam. Wires generate heat under load, and spray foam is an excellent insulator, meaning it will trap that heat. This is known as “derating.” While most low-power DC circuits (like LED lights) won’t be an issue, high-draw circuits for items like water heaters or induction cooktops should be run in open-air channels or oversized conduits to allow for some air circulation and heat dissipation. Encapsulating a high-amperage wire tightly in foam can cause it to overheat, melt its insulation, and create a dangerous short circuit.
Key takeaways
- The primary goal of van insulation is moisture control via a monolithic air seal, not just achieving a high R-value.
- Closed-cell spray foam is the ideal material because it acts as both insulation and a vapor retarder, bonding directly to the van’s skin.
- Critical application steps include meticulous surface prep for adhesion, avoiding “no-spray” zones like weep holes, and applying the correct foam thickness to prevent waste and excess weight.
How to Keep Your Van Habitable in -5°C Winters and 30°C Summers Without Excessive Energy
Even with a perfectly applied layer of closed-cell spray foam, one final enemy stands in the way of true four-season comfort: thermal bridging. A thermal bridge is a pathway of least resistance for heat, created by materials with high thermal conductivity that bypass your insulation. In a van, the culprits are the metal ribs and structural members of the frame. Heat will flow through these metal “bridges” up to 400 times more easily than through the surrounding insulated area, creating cold spots, promoting condensation, and forcing your heater or air conditioner to work much harder.
Simply spraying foam between the ribs and then covering them with a wood panel is not enough. The metal rib will still be in direct contact with the interior panel, creating a direct line for heat to escape. A practical demonstration of this effect is startling.
Case Study: The Real-World Impact of Thermal Bridging
Using an infrared camera, a diligent van builder measured the real-world heat loss from these uninsulated ribs. Their measurements showed that each square inch of an uninsulated metal ceiling rib lost approximately 2.4 times as much heat as the adjacent insulated panel. On a cold day, these ribs become visible as lines of condensation on your interior panels, showing exactly where your energy is being wasted.
Tackling these thermal bridges is the final step to creating a truly efficient and habitable space. The goal is to create a “thermal break”—a layer of insulation between the metal rib and your final interior wall panel. Even a thin layer of material can make a huge difference. This is the final piece of the puzzle, turning your well-insulated van into a space that remains comfortable in extreme temperatures without constantly draining your batteries.
Action Plan: Mitigating Thermal Bridges in Your Van
- Identify Contact Points: Before paneling, identify every point where your interior walls will touch a metal rib or frame member. These are your thermal bridges.
- Collect Break Materials: Gather materials for your thermal break. This can be a thin (1/4″ or 6mm) layer of closed-cell foam tape, cork strips, or even just leaving a deliberate air gap where possible.
- Apply the Break: Apply your chosen thermal break material directly onto the face of every metal rib. Ensure a continuous layer that will fully separate the metal from your wood or plastic wall panels.
- Verify with Temperature: On the first cold day after your build is complete, use an inexpensive infrared thermometer. Measure the surface temperature on a panel directly over a rib, and then a few inches away. A successful thermal break will result in only a minor temperature difference.
- Prioritize the Ceiling: Since heat rises, thermal bridging on the ceiling has the most significant impact on heat loss and overall comfort. If you have limited time or budget, focus your efforts here first.
By focusing on the physics of moisture control, air sealing, and thermal bridging, you can move beyond simple R-values and build a van that is truly ready for any adventure, in any season. The next step is to apply this knowledge to your own build, planning each stage meticulously to create a durable, comfortable, and rust-free mobile home.