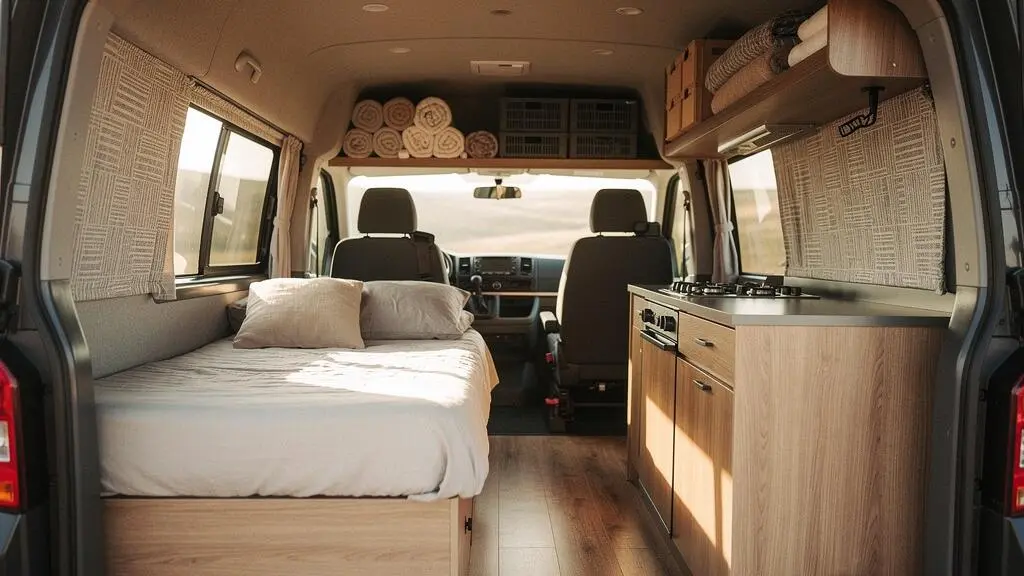
Stop trying to cram furniture into your van. The secret to a truly efficient 10m² layout is designing your power and water systems first, letting them define your space.
- Fixed beds kill adaptability; modular systems built on a solid electrical and plumbing foundation offer true long-term flexibility.
- Poor airflow, not just leaks, is the primary cause of mould. Active ventilation is a non-negotiable part of your layout’s core system.
Recommendation: Audit your off-grid energy and water needs before you even think about where the bed will go. That calculation dictates your entire layout.
The initial thrill of converting a van quickly meets a daunting reality: the cold, hard geometry of a 10-square-metre metal box. Every online guide presents the challenge as a game of spatial Tetris, where the goal is to squeeze a bed, kitchen, and storage into a seemingly impossible footprint. The default advice is almost always the same: build a high, fixed bed to create a “garage” underneath, and maybe use a convertible sofa if you’re feeling adventurous. This approach frames the problem as one of furniture placement, a puzzle of visible objects.
But what if this entire premise is flawed? What if the key to unlocking an efficient and comfortable layout isn’t about the bed or the cabinets at all? The true art of small-space design lies not in what you see, but in the invisible life-support systems that make the space habitable. An optimised van is not a collection of furniture; it’s an integrated machine for living, where the layout is a direct consequence of a well-designed power, water, and airflow strategy. This is the systems-first design approach.
By starting with your off-grid autonomy needs—how much water you’ll carry, the size of your battery bank, where your ventilation must be—you create a set of non-negotiable constraints. These constraints then logically dictate the placement of every other element. This guide will walk you through this paradigm shift, from calculating your system requirements to understanding the critical mistakes that can ruin a build, ensuring your layout is not just clever, but fundamentally sound.
To navigate this comprehensive design philosophy, we’ve structured this guide to address the most critical decisions and challenges you’ll face. The following sections break down everything from foundational system design to the finishing touches that ensure safety and longevity.
Summary: A Systems-First Guide to Hyper-Efficient Van Layouts
- Why Fixed Bed Platforms Limit Flexibility and Modular Furniture Adapts to Changing Needs
- How to Size Your Water Tanks and Battery Bank for 5 Days Without Hookups
- Professional Build or DIY: Which Van Conversion Route Saves Money Long-Term
- The Airflow Mistake That Creates Black Mould in 60% of DIY Van Conversions
- What Van Conversion Jobs Should You Outsource to Avoid Safety or Legal Issues
- How to Find Compact Cars That Fit 4 Adults Comfortably Despite Short Wheelbases
- How to Plot Your Planned Activities on a Map to Find the Perfect Accommodation Triangle
- How to Install Spray Foam Insulation in Your Van Without Trapping Moisture
Why Fixed Bed Platforms Limit Flexibility and Modular Furniture Adapts to Changing Needs
The most common starting point in a DIY van build—the fixed, raised bed—is also its greatest limiting factor. By dedicating the largest single volume of the van to one function, you immediately sacrifice adaptability. This decision locks in your “garage” size and dictates the entire flow of the remaining space before you’ve even considered how you’ll live in it. It creates a layout with a very low flexibility quotient, making it difficult to adapt as your needs change from a weekend trip to a month-long expedition.
A systems-first approach inverts this logic. Instead of building the bed first, you prioritise modularity. Think of your van’s interior not as a static room, but as a collection of functional pods that can be reconfigured. Using materials like aluminium extrusion allows for building strong, lightweight frames that can be adjusted or repurposed. Pre-made kitchen pods and modular cabinets can be installed after the core systems, allowing you to optimise their placement based on the true centre of gravity and utility access points.
This method offers unparalleled long-term value. A modular setup means you can upgrade your fridge, change your seating arrangement, or add a workspace without tearing out half the build. It treats the van as an evolving platform rather than a fixed asset. The initial investment in a modular framework pays dividends in reduced rework and a space that can grow with you. The bed becomes the last piece of the puzzle, designed to fit within the flexible, system-optimised space you’ve already created.
How to Size Your Water Tanks and Battery Bank for 5 Days Without Hookups
Designing for five days of off-grid autonomy isn’t about guessing; it’s about creating a precise off-grid autonomy budget. This budget is the cornerstone of your systems-first design, as the size and location of your water tanks and battery bank will dictate where everything else can—and cannot—go. For a critical full-time system, engineers often recommend sizing for at least 2 to 3 days of autonomy as a baseline, so a five-day goal requires meticulous planning.
For your electrical system, the process begins with a detailed audit of every single appliance you plan to use. You must calculate the total watt-hours each device will consume per day. This number is your base energy demand. From there, you multiply it by your desired days of autonomy (five, in this case) and then apply crucial modifiers for real-world inefficiencies. You must account for the battery’s maximum depth of discharge (you can’t use 100% of most batteries), inverter losses, and a safety margin for cloudy days or unexpected usage.
Water calculation is more straightforward but equally critical. A common estimate is 5-10 litres per person per day for drinking, cooking, and basic hygiene. For a five-day trip for two people, this means planning for 50-100 litres of fresh water. This volume directly translates to a specific tank size and weight, which must be positioned carefully to maintain vehicle balance. Your grey water tank should ideally match this capacity. Sizing these two systems in tandem ensures your autonomy isn’t cut short by a lack of power or water.
Your 5-Step Off-Grid Autonomy Audit
- List all appliances: Document the daily watt-hour usage of every electrical device to establish your base energy demand.
- Calculate total demand: Multiply your daily energy usage by five (days of autonomy) to get your total energy requirement.
- Factor in inefficiencies: Adjust the total demand to account for your battery’s depth of discharge limit, inverter losses (typically 10-15%), and add a 20% safety reserve.
- Size the battery bank: Convert the final watt-hour total into amp-hours based on your system voltage (12V or 24V) to determine the required battery bank capacity.
- Cross-check water needs: Calculate your five-day water requirement (e.g., 10L x 2 people x 5 days = 100L) and ensure your selected water tank size and location are compatible with the space allocated for your battery bank.
Professional Build or DIY: Which Van Conversion Route Saves Money Long-Term
The debate between a do-it-yourself conversion and a professional build often boils down to upfront cost versus long-term value. While a DIY build is undeniably cheaper on paper, this initial saving can be a false economy. The true cost of a conversion isn’t just the materials; it’s the time, the tools, the mistakes, and the potential for costly rework. A poorly executed DIY project can lead to issues with safety, functionality, and rapid depreciation, erasing any initial savings.
Professional builders bring expertise, specialized tools, and an understanding of industry standards that a first-time converter simply cannot match. They understand the nuances of vehicle weight distribution, the legal requirements for gas and electrical installations, and the material science needed to prevent issues like condensation and mould. This expertise translates into a higher quality, safer, and more durable final product. The resale value of a professionally converted van is significantly higher, as buyers are willing to pay a premium for the peace of mind that comes with a certified build.
As the experts at Boujee Builds point out, this difference in quality has a direct financial impact. Their insight highlights a crucial aspect often overlooked in the initial excitement of a DIY project:
Professionally built vans maintain their value and avoid costly rework.
– Boujee Builds, DIY vs Professional Van Conversion: Which Is the Better Choice for 2026?
Ultimately, the decision depends on your skills, time, and risk tolerance. If you are a skilled craftsperson with ample time and a deep understanding of vehicle systems, a DIY build can be a rewarding project. However, for most people, especially those focused on the investment and longevity of their mobile living space, the higher upfront cost of a professional build often represents the smarter financial decision in the long run.
The Airflow Mistake That Creates Black Mould in 60% of DIY Van Conversions
Every person living in a van is a moisture generator. Through breathing, cooking, and simply existing, we pump litres of water vapour into a small, sealed metal box every day. This creates what can be called a Moisture Engine. The single biggest mistake in DIY conversions is underestimating this engine, leading to rampant condensation and, in an alarming number of cases, destructive black mould. The problem isn’t just a leak; it’s the air itself.
The core of the issue is the temperature difference between the warm, moist interior air and the cold surface of the van’s metal skin. When this warm air hits the cold metal, it releases its moisture as condensation. If this moisture becomes trapped behind wall panels, insulation, and furniture, it creates the perfect breeding ground for mould. As the team at FarOutRide aptly notes, this isn’t a rare occurrence but a fundamental challenge of this lifestyle:
Condensation and moisture are pretty much inevitable when living the vanlife.
– FarOutRide, Condensation in Van: Why It Happens and How To Manage It
A proper layout must be designed around airflow from the very beginning. This means creating an uninterrupted vapour barrier on the “warm side” of the insulation to prevent moist interior air from reaching the cold van walls. More importantly, it requires active, not passive, ventilation. A system with a powered roof fan for extraction and a low-level vent for intake creates a constant, gentle cross-flow of air, actively pulling moist air out before it has a chance to condense. The tragic, and common, outcome of ignoring this is a build that rots from the inside out.
Case Study: The First-Winter Mould Disaster
The danger of poor airflow is starkly illustrated by the experience of one UK van-lifer. After spending his first winter in his new build, he noticed mould spots appearing on the skirting boards. Upon investigation, he was horrified to discover that black mould had completely colonized his wooden support battens and wool insulation. The cause was a flawed vapour barrier and inadequate ventilation, which trapped months of condensation behind the walls. The damage was so severe that it, as detailed in an account on The Van Conversion blog, forced him to completely strip out the entire interior and start his conversion from scratch—a costly and heartbreaking lesson in the physics of moisture.
What Van Conversion Jobs Should You Outsource to Avoid Safety or Legal Issues
While the DIY spirit is admirable, some jobs carry risks that far outweigh the satisfaction of doing them yourself. When it comes to van conversions, electrical and gas systems are at the top of the list of tasks best left to professionals. The consequences of a mistake are not just cosmetic; they can be catastrophic, leading to fire, electrocution, or carbon monoxide poisoning. Furthermore, improper installations can void your vehicle’s insurance and create significant legal liability.
The complexity of modern van electrical systems—involving high-amperage DC circuits, inverters, solar charge controllers, and lithium batteries—requires a level of knowledge that goes far beyond basic wiring. A professional understands how to correctly size wires, select the right fuses and circuit breakers, and ensure the entire system is grounded and protected against short circuits. Similarly, installing a propane system for a stove or heater involves precise fittings, leak testing, and proper ventilation for storage lockers, all of which are governed by strict safety codes.
Outsourcing these critical tasks is not an admission of failure; it is a mark of a smart, safety-conscious builder. The cost of hiring a certified electrician or a licensed gas fitter is a small price to pay for the assurance that your mobile home is safe. The most common DIY pitfalls in these areas include:
- Incorrect wiring: Using wires that are too thin for the current they carry, creating a fire hazard.
- Overloaded circuits: Placing too many appliances on a single circuit, leading to tripped breakers or blown fuses.
- Wrong fuses: Using an incorrectly rated fuse that fails to protect the circuit and appliances from overcurrent.
- Unsafe propane setups: Poorly sealed connections or unventilated propane lockers that can lead to gas leaks and potential explosions.
- Water leaks and poor ventilation: A secondary, but still critical, issue where poor plumbing or ventilation can lead to moisture damage in electrical components.
By identifying these high-risk jobs upfront and budgeting to outsource them, you protect your investment, your safety, and your peace of mind.
How to Find Compact Cars That Fit 4 Adults Comfortably Despite Short Wheelbases
At first glance, the design of a compact car seems entirely unrelated to a van conversion. However, automotive engineers are the undisputed masters of extracting maximum utility from minimal space. The principles they use to make a small car feel spacious are directly applicable to designing a 10m² van layout. Studying how they create comfort for four adults in a tight cabin offers a masterclass in spatial intelligence.
The key takeaway is the concept of perceived space versus actual space. Car designers use clever tricks to make an interior feel larger than it is. These include using light-coloured materials for the headliner and upper panels, maximising window size to bring in natural light, and designing slim, sculpted seats that provide support without bulky padding. In a van, this translates to choosing light-coloured paint or cladding, keeping window sightlines clear, and building furniture with a minimal physical and visual footprint.
Furthermore, compact cars excel at multi-functionality and ergonomic design. A centre console isn’t just a divider; it’s storage, an armrest, and a control hub. Seats fold and slide in multiple directions to accommodate passengers or cargo. Applying this thinking to a van means every element should serve at least two purposes. A bench seat contains storage and houses the water tank. A section of the countertop flips up to reveal a hidden sink. By adopting this “automotive designer” mindset, you stop seeing your van as a room to be filled and start seeing it as a machine where every component is optimised for efficiency and human comfort.
How to Plot Your Planned Activities on a Map to Find the Perfect Accommodation Triangle
The “accommodation triangle” is a concept from travel planning, but its logic provides a powerful framework for designing your van’s interior. Instead of a geographical map, your “map” is your van’s floor plan. Instead of tourist sites, your “activities” are the core functions of daily life: sleeping, cooking, and working/relaxing. Plotting these activities on your floor plan reveals the crucial ergonomic pathways and relationships that define a good layout.
The goal is to create an efficient “work triangle,” a principle borrowed from kitchen design. In a van, this triangle connects the three key zones: the fridge (storage), the sink (cleaning), and the stove (cooking). An efficient layout minimizes the steps between these three points. Can you grab a vegetable from the fridge, rinse it in the sink, and place it on the stove without performing gymnastics around the bed? This simple test can immediately validate or invalidate a potential floor plan.
This concept extends beyond the kitchen. Consider the relationship between your bed and your workspace. If you work remotely, can you easily transition from a sleeping space to a functional office without a 20-minute conversion process? Think about the “activity” of entering and exiting the van. Is the main walkway clear, or is it blocked by the cooler or a shoe storage box? By mapping out these daily movements—your personal activity patterns—you can identify friction points and design a layout that feels intuitive and effortless. The perfect layout isn’t about a specific style; it’s the one that best supports your unique triangle of daily activities.
Key Takeaways
- Design Systems First: Your layout should be a consequence of your electrical and water system needs, not the other way around.
- Prioritize Airflow: An active ventilation system with a proper vapour barrier is more critical than any piece of furniture for the long-term health of your van.
- Outsource for Safety: Always budget for professional help with high-voltage electrical and propane gas systems to ensure safety and compliance.
How to Install Spray Foam Insulation in Your Van Without Trapping Moisture
Spray foam insulation is a popular choice for van conversions due to its high R-value and ability to fill irregular cavities, creating an airtight seal. However, choosing the wrong type or installing it incorrectly can turn this benefit into a disaster, trapping moisture against the van’s metal skin and accelerating rust and mould. The critical distinction lies between closed-cell and open-cell foam.
Closed-cell spray foam is the only appropriate choice for a vehicle conversion. Its structure consists of tiny, sealed gas pockets that do not absorb water, effectively acting as both an insulator and a vapour barrier in one. In contrast, open-cell foam acts like a sponge, readily absorbing and holding moisture. Using open-cell foam in a van is a guaranteed recipe for creating a hidden swamp behind your walls. The performance difference is stark: a study on R-values shows that closed-cell spray foam achieves R-6.0 to R-7.0 per inch, nearly double the R-3.5 to R-3.8 per inch of open-cell foam, providing superior thermal resistance with less thickness.
Proper installation requires meticulous preparation. The metal surface must be perfectly clean, dry, and free of any rust. The foam should be applied directly to the metal skin. It’s crucial not to create a cavity between the foam and the metal, as this is where condensation will form. While DIY kits are available, the chemical mixture and application temperature are sensitive. A professional application ensures the foam cures correctly and adheres properly, creating a monolithic, waterproof layer of insulation. The thickness of the foam will depend on the zone, with ceilings requiring the most insulation to combat solar heat gain.
This table, based on common professional recommendations, provides a clear guide for planning your insulation thickness.
| Application Zone | Recommended Thickness | Approximate R-Value Reached |
|---|---|---|
| Walls / wall cavities | 2 to 3 inches | ~R-13 to R-19 |
| Floor over unconditioned space | ~3 inches | R-19 |
| Ceiling / roof cavity | 4 to 7 inches | R-38 to R-49 |
This approach, highlighted by an analysis of insulation best practices, ensures your van remains warm, dry, and protected from hidden moisture damage.
By embracing a systems-first design philosophy, you transform the daunting task of laying out a small van into a logical, step-by-step process. This approach moves beyond simple furniture arrangement to create a truly integrated and efficient mobile living space. To put these concepts into practice, the next logical step is to begin the detailed planning and auditing of your specific needs.