In summary:
- Ex-lease vans offer significant savings due to bulk depreciation, but require careful inspection of high-wear components.
- Focus inspections on structural rot in floors/bulkheads and listen for signs of a failing Diesel Particulate Filter (DPF), the most common high-mileage failure.
- Prioritise van models with strong community support and parts availability (like the Sevel platform) to keep DIY conversion costs down.
- Always choose an engine with enough torque for your fully loaded conversion weight, not just for an empty van.
The dream of van life often starts with a search for the perfect, affordable base vehicle. For those on a budget under £8,000, the market is flooded with high-mileage ex-delivery vans. They promise a low entry price, but hide a minefield of potential five-figure repair bills for the unwary buyer. Many aspiring converters focus on generic advice: “check the tyres,” “listen to the engine,” or “look for a service history.” While not wrong, this approach misses the specific failure points unique to vehicles that have lived a hard commercial life.
The common wisdom suggests that lower mileage is always better, but this isn’t the full story for a commercial diesel. Likewise, a clean interior can easily mask catastrophic corrosion hidden beneath fresh ply-lining. The real challenge isn’t just buying a van; it’s buying the *right* van by learning to spot the red flags that most private buyers miss. This requires shifting your mindset from that of a consumer to that of a vehicle inspector.
But what if the key wasn’t just a longer checklist, but knowing exactly where to look and what to listen for? Instead of fearing high mileage, what if you could understand its specific impact and identify the difference between a well-maintained workhorse and a ticking mechanical time bomb? This guide is built on that premise. We will dissect the most critical inspection points, moving beyond the surface to analyse structural integrity, engine health, and the long-term viability of a van for a DIY conversion.
This guide provides an inspection-focused framework to help you navigate the used commercial market. We’ll explore why ex-lease vans are a smart buy, how to perform critical structural checks, choose the right size, and identify the most common and costly engine issues before they become your problem.
Table of Contents: How to Inspect a Used Van for Conversion
- Why Ex-Lease Delivery Vans Are 30% Cheaper and More Reliable Than Private Sales
- How to Check a Used Van’s Floor and Bulkhead for Hidden Rot in 10 Minutes
- SWB or LWB: Which Van Length Balances Living Space With City Parking Ability
- The High-Mileage Mistake That Causes Engine Rebuilds in 1 Out of 4 Conversion Projects
- What Van Models Offer the Most Online Guides and Parts Availability for DIY Builds
- Why an Undersized Engine Fails in a Fully Loaded Campervan
- How to Maximise Space for Four in a Compact (SWB) Van
- How to Design a Van Layout That Fits Bed, Kitchen and Storage in 10 Square Metres
Why Ex-Lease Delivery Vans Are 30% Cheaper and More Reliable Than Private Sales
The biggest financial advantage of an ex-lease or ex-fleet van is the aggressive depreciation they’ve already absorbed. A commercial vehicle’s value is front-loaded, and comprehensive research on van depreciation shows a 30-40% value loss in the first three to four years of its life. This is the period when large companies typically run their fleets. When these vans are sold, they enter the market at a price point far below what a private owner, who bought the van for personal use, would be willing to accept. This creates an immediate saving for the budget-conscious converter.
This pricing advantage is amplified by the economics of fleet disposal. As the vehicle trade specialists at eCarsTrade note, the process is built for wholesale efficiency, not retail profit. They explain:
Since ex-lease cars are returned in large numbers at the end of their contracts, they’re often sold in bulk, letting dealers buy at competitive prices, often much lower than private sellers.
– eCarsTrade, Ex-Leased vs Private Car: Which One Is Better to Buy?
Beyond price, there’s a compelling argument for reliability. While these vans often have high mileage, they are typically subject to mandatory, non-negotiable service schedules to comply with lease agreements and health and safety regulations. This means oil changes, filter replacements, and critical checks are often performed more consistently than on a privately owned van where maintenance can be deferred. The key is to verify this history and perform your own targeted checks on the specific wear points of a commercial vehicle. This combination of forced maintenance and steep depreciation creates a sweet spot for DIY builders.
Your Pre-Purchase Verification Plan for an Ex-Fleet Van
- Confirm Ownership History: Ask the seller directly about previous owners. If they are unsure, use a government MOT checker with the registration number to review the van’s annual mileage history and test advisories.
- Analyse Mileage Patterns: Treat an annual mileage significantly above 25,000 miles as a flag for further inspection, particularly on the DPF and clutch. It’s not an automatic deal-breaker, but a sign of a hard-working life.
- Leverage Community Knowledge: Before viewing a specific model, join its dedicated owner groups on platforms like Facebook. Search for common complaints like “DPF issues,” “rust spots,” or “gearbox problems” to learn what to look for.
- Clarify VAT Status: If buying from a business dealer, always confirm whether the listed price includes Value Added Tax (VAT). As a private buyer, this 20% cost is not reclaimable and must be factored into your total budget.
This initial saving is the first step, but it only holds value if the vehicle’s core structure is sound.
How to Check a Used Van’s Floor and Bulkhead for Hidden Rot in 10 Minutes
Surface rust on body panels is often cosmetic, but corrosion on a van’s floor, sills, and bulkhead can indicate terminal structural failure. These are the areas that bear the load of the cargo—and eventually, your entire conversion. Delivery vans suffer from water ingress from constantly opened doors and condensation trapped under damp ply-lining. This creates a perfect environment for hidden rust that can compromise the vehicle’s safety and lead to an MOT failure you can’t afford to fix.
Your inspection should be tactile, not just visual. Start by pulling back any floor mats or linings. Pay close attention to the seams where the floor meets the walls and the base of the bulkhead separating the cab from the cargo area. Look for bubbling paint, flaking underseal, and any signs of previous welding repairs, which may be of poor quality. Most importantly, press firmly with your thumb or the handle of a screwdriver on any suspect areas. Solid metal feels firm; rotten metal will feel soft, springy, or even crumble under pressure.
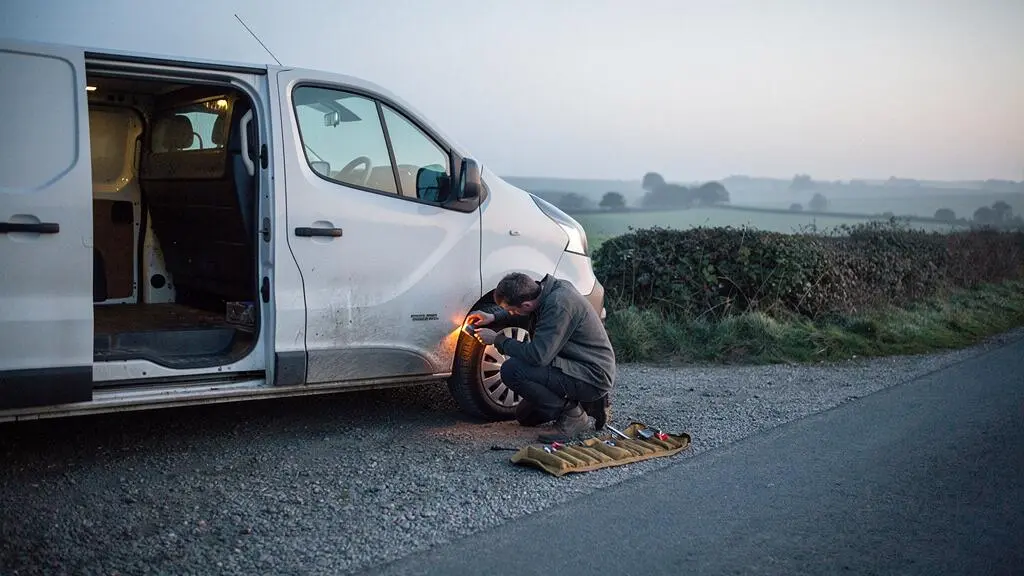
As this image shows, the most dangerous rot often starts at the edges and seams. Check the inner wheel arches and the door sills, as these are collection points for water and road salt. Don’t be shy about getting on your hands and knees with a torch to inspect the underside. A van that looks clean on top can be a crumbling mess below. Finding significant rot in these load-bearing areas should be an instant deal-breaker, no matter how well the engine runs.
A ten-minute check here can save you thousands in welding repairs or the heartache of scrapping a project.
SWB or LWB: Which Van Length Balances Living Space With City Parking Ability
The choice between a Short Wheelbase (SWB) and a Long Wheelbase (LWB) van is a fundamental trade-off between liveability and manoeuvrability. An LWB offers significantly more internal volume, which translates to more creative freedom in your layout—perhaps a permanent fixed bed or a dedicated shower cubicle. However, that extra length comes at the cost of everyday usability. Parking an LWB van in a standard supermarket bay is a challenge, and navigating narrow city streets or tight rural lanes can become a constant source of stress.
The difference isn’t just about length; it’s about engineering. As this comparative data for a popular van model shows, a longer wheelbase directly impacts payload capacity and overall weight.
| Specification | SWB | LWB |
|---|---|---|
| Overall length | 172.3 in (approx. 4.38m) | 200.7 in (approx. 5.10m) |
| Cargo volume | 88.7 cu ft | 122.4 cu ft |
| Payload capacity | 625 kg – 825 kg | 714 kg – 1,004 kg |
This data, highlighted in an analysis by Swiss Vans, demonstrates that while an LWB provides more space, it’s also a heavier vehicle to begin with. This reduces the available payload for your conversion. You must account for the weight of your insulation, wood, water tanks, and equipment to ensure you don’t exceed the van’s Gross Vehicle Weight (GVW).
Ultimately, the right choice depends on your intended use. If you plan to spend most of your time in remote locations and value interior space above all else, an LWB is a strong contender. However, if your van will double as a daily driver or you plan to explore historic towns and cities, the practicality and ease of parking an SWB model often outweigh the compromise on living space. A smaller van forces you to be more creative with your design, but it also grants you more freedom to travel without logistical headaches.
This decision shapes your entire van life experience, from the layout you can build to the places you can explore.
The High-Mileage Mistake That Causes Engine Rebuilds in 1 Out of 4 Conversion Projects
The single biggest mistake budget van buyers make is misinterpreting “high mileage.” They worry about general engine wear when the real financial time bomb in a modern diesel is the Diesel Particulate Filter (DPF). These devices are designed to trap soot from the exhaust, “regenerating” or burning it off during long, high-speed journeys. However, delivery vans often operate on short, start-stop urban routes, which prevent the DPF from reaching the temperature needed to regenerate. The filter clogs, putting immense back-pressure on the engine and turbo.
An ignored DPF warning light can lead to catastrophic failure. The engine can enter “limp mode,” and in worst-case scenarios, unburned fuel forced into the system can contaminate the engine oil, leading to a loss of lubrication and potential engine seizure. The cost to fix this is staggering; a DPF replacement is rarely a simple affair. Data from industry experts shows that the price range of DPF replacements is £750 to £3,500, a budget-destroying expense for any conversion project.
During a test drive, you must actively look for the warning signs of a failing DPF. The most obvious clue is the DPF warning light on the dashboard. Do not accept a seller’s excuse that it “just needs a good run.” Other critical symptoms include a noticeable loss of power, a strong smell of diesel, or the engine’s cooling fan running constantly. A sudden drop in the manufacturer’s stated fuel economy is another major red flag, as the engine is over-fuelling in a desperate attempt to clear the blockage. Spotting these signs is non-negotiable for avoiding a van with a fatal flaw.
This single component, not the overall mileage, is the primary source of five-figure repair bills on ex-commercial vans.
What Van Models Offer the Most Online Guides and Parts Availability for DIY Builds
For a DIY converter on a tight budget, the choice of van model extends beyond its initial cost and condition. The long-term affordability of your project depends heavily on parts availability and community support. A van that is popular with commercial fleets and other converters will have a vast ecosystem of affordable aftermarket parts, detailed online repair guides, and countless YouTube tutorials. This “conversion headroom” can save you thousands in labour costs and diagnostic fees over the life of your vehicle.
One of the most strategic choices for a European-market DIY build is a van from the Sevel (Société Européenne de Véhicules Légers) joint venture. As the experts at VANZ Adventures point out, this platform offers a unique advantage:
Fiat Ducato, Peugeot Boxer, and Citroen Relay are the same van under three badges – built by the Sevel joint venture (Stellantis-owned). One chassis, one body, three dealer networks.
– VANZ Adventures, Fiat Ducato, Peugeot Boxer & Citroen Relay Campervan Furniture
This shared platform means that a huge number of mechanical and body parts are interchangeable between the three models, dramatically increasing the pool of available second-hand spares. The boxy, wide chassis of the Sevel vans also makes them a favourite for conversions, leading to a wealth of layout guides and pre-fabricated furniture kits. Other strong contenders with excellent support include the Ford Transit and the Mercedes-Benz Sprinter, though parts for the latter can often be more expensive.
The long-term durability of these workhorses, particularly their resistance to rust, is another key factor cited by experienced owners. In a forum discussion, one owner compared their fleet vehicle to their personal one, highlighting a critical manufacturing detail:
Our Fiat Relay works engineering/maintenance/pool van has been horribly abused and neglected and is still running great; the fully galvanized detail is the biggest plus point, from someone who owns his own Transit.
– Forum User, singletrackworld.com
Choosing a van with a galvanized body and a strong community following is a strategic move that pays dividends throughout the build and ownership experience.
This decision impacts everything from finding a replacement wing mirror on eBay to troubleshooting a complex electrical issue with the help of a forum.
Why an Undersized Engine Fails in a Fully Loaded Campervan
A common pitfall for first-time converters is test-driving an empty panel van and finding its performance perfectly adequate. They forget that their finished conversion will add anywhere from 500kg to 1,000kg of permanent weight. An engine that feels zippy when the van is empty can become dangerously underpowered once it’s loaded with a bed, kitchen, water tanks, and passengers. This isn’t just about slow acceleration; it’s about engine strain and safety.
The critical factor is torque, not just horsepower. Torque is the engine’s twisting force, its ability to do work. It’s what gets a heavy vehicle moving from a standstill and what keeps it pulling up a steep gradient. An undersized engine, especially a smaller non-turbo diesel or low-capacity petrol engine, will lack the torque to handle the Gross Vehicle Weight (GVW) of a completed campervan. When faced with a steep hill, the driver will have to constantly use high revs and lower gears, putting immense stress on the engine, clutch, and transmission.
This constant strain leads to premature wear and overheating. Climbing a 12% gradient in a fully loaded, underpowered van can push engine temperatures into the red, risk head gasket failure, and cause rapid clutch wear. When researching a van, look for engine options with higher torque figures (measured in Newton-metres or Nm). A 2.0L or 2.3L turbo-diesel engine is generally a much safer bet for a medium to long wheelbase conversion than a 1.6L or smaller equivalent. Prioritising an engine with sufficient power-to-weight ratio for your *finished* build is one of the most important long-term reliability decisions you can make.
Don’t just plan for the van you’re buying; plan for the campervan it will become.
How to Maximise Space for Four in a Compact (SWB) Van
Opting for a Short Wheelbase (SWB) van for its city-friendly dimensions doesn’t mean you have to abandon the idea of travelling with friends or family. However, accommodating four people comfortably in a smaller footprint requires a ruthless focus on multi-functionality and modular design. The traditional fixed-bed layout, a luxury in LWB vans, is simply not viable. Every element of the design must serve at least two purposes.
The heart of a four-person SWB layout is the seating and sleeping area. A rock-and-roll bed is a popular choice, transforming from a belted, forward-facing bench seat for two passengers into a double bed at night. This is often paired with front driver and passenger seats that are fitted with swivel bases. During the day, these seats can be turned 180 degrees to face the rear, creating a lounge and dining area for four around a removable table. This single design feature effectively doubles your usable living space without adding an inch to the van’s length.
Storage must be vertical and clever. Use the space above the cab for bedding or bulky items. Build slim, floor-to-ceiling cabinets and use nets or bungee cords on walls to hold smaller items. The kitchen unit should be compact, perhaps featuring a sink that doubles as extra counter space with a cover, and a portable stove that can be stored away when not in use. By embracing a minimalist mindset and demanding that every component serves multiple roles, it’s entirely possible to create a functional and comfortable space for four people, even within the constraints of a compact van.
Success in a compact van isn’t about how much you can fit in, but how many functions each item can perform.
Key Takeaways
- Structural integrity over cosmetics: A pristine-looking van can hide terminal chassis rot. Prioritise floor and sill inspections.
- The DPF is the real risk: High mileage isn’t the enemy; a clogged Diesel Particulate Filter from short-trip city driving is. Learn the warning signs.
- Choose a popular platform: Parts availability and community support (e.g., for Sevel vans like Ducato/Boxer) will save you thousands on your DIY build.
How to Design a Van Layout That Fits Bed, Kitchen and Storage in 10 Square Metres
Designing a functional living space within the confines of approximately 10 square metres—the typical floor area of a medium van—is a puzzle of priorities. The key is to start with your non-negotiables. For most people, this comes down to the “big three”: sleeping, cooking, and storage. The way you arrange these three elements will define the entire flow and feel of your van. Don’t start by browsing Instagram for inspiration; start by analysing how you personally intend to live in the space.
There are several established layout archetypes. A popular choice is the rear fixed bed, often raised to create a large “garage” storage area underneath for bikes or outdoor gear. This offers the luxury of a permanent, ready-to-use bed but consumes a significant portion of the van’s length. The alternative is a convertible seating area, where benches and a table transform into a bed each night. This maximises daytime living space but adds the daily chore of making and unmaking your bed.
Once your bed/seating is decided, position the kitchen. A galley kitchen along one side of the van is space-efficient. Placing it by the sliding door is a popular choice, as it allows for cooking with ventilation and a view. Finally, integrate storage wherever you can. Use overhead cabinets, build storage into bench seats, and utilize the “dead space” above the driver’s cab. Think in three dimensions. The goal is to create distinct zones for different activities, even in a small space, to make it feel organised and intentional rather than cramped and chaotic.
Start your design process now by sketching these layouts on paper. This simple exercise will quickly reveal which compromises you are willing to make and which features are essential for your personal van life adventure.